This section introduces open source tools needed for open source management and explains how to use them.
Author : Haksung Jang / CC BY 4.0
This is the multi-page printable view of this section. Click here to print.
This section introduces open source tools needed for open source management and explains how to use them.
Author : Haksung Jang / CC BY 4.0
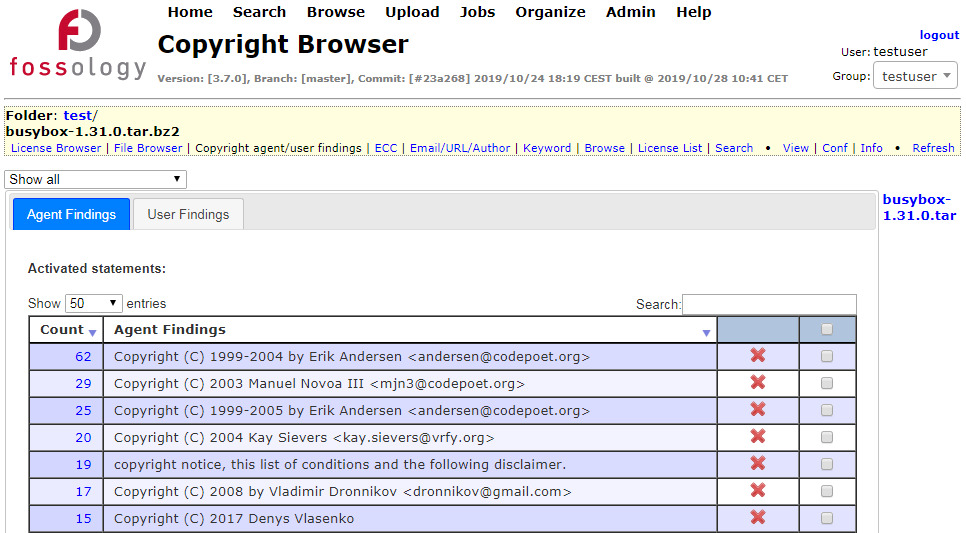
For open source compliance, you can use a source code scanning tool to detect the open source and license information contained within software.

The Linux Foundation’s FOSSology project developed this scanning tool and released it as open source so that anyone can use it freely.
FOSSology is a web-based program that lets users log in to the website and upload individual files or software packages. FOSSology detects license text and copyright information within the uploaded files. Developers should use FOSSology when they want to check what license a piece of open source carries and what its copyright information looks like. FOSSology scans every file in an uploaded open source package, automatically detects license-related text and copyright information in each file, and generates a report from it. For more details on FOSSology’s key features, refer to the following page. : https://www.fossology.org/features/
To use FOSSology within a company, you need to build a FOSSology server in-house. This requires installing FOSSology on a Linux-based server system. FOSSology can be installed in the following three ways.
This section explains the simplest method, using Docker.
FOSSology publishes a containerized Docker image through Docker Hub (https://hub.docker.com/). : https://hub.docker.com/r/fossology/fossology
The pre-built Docker image can be run using the following command.
$ docker run -p 8081:80 fossology/fossology
The Docker image can be accessed with the following URL and account information. : http://[IP_OF_DOCKER_HOST]:8081/repo
For more details on installation, refer to the following page. : https://github.com/fossology/fossology/blob/master/README.md
If it is difficult to build a system on which to install FOSSology, you can use the test server provided by the FOSSology Project. The FOSSology project provides an environment for testing. (The test server may go down without notice.)
Users can access the FOSSology test server with the following account to try out FOSSology’s features.
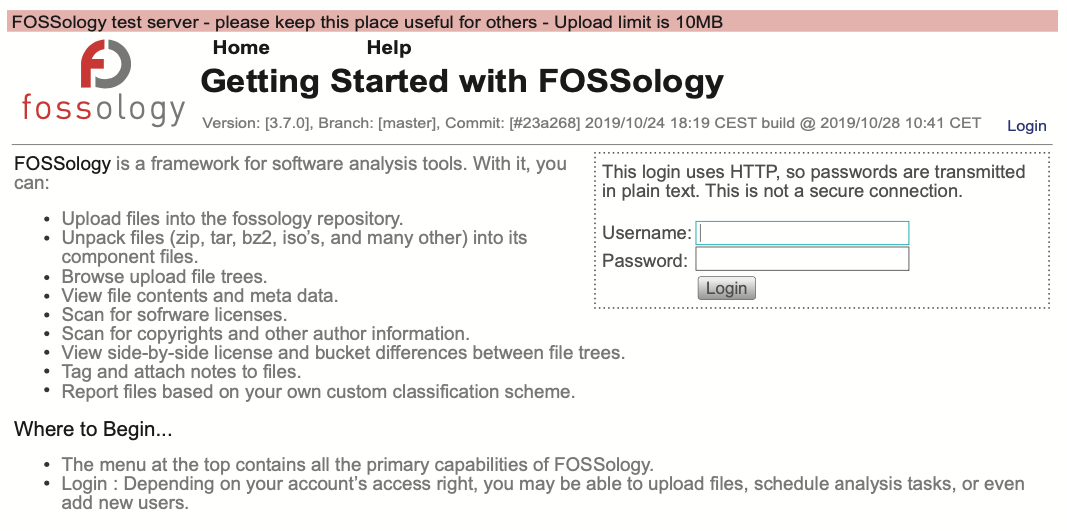
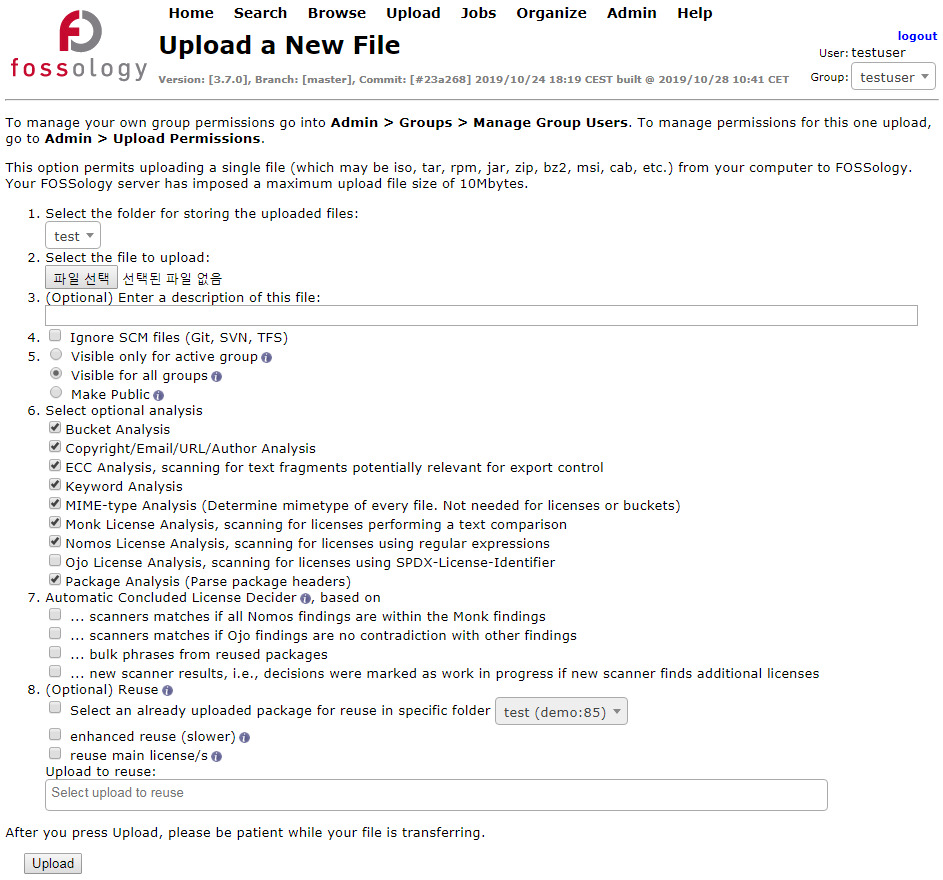
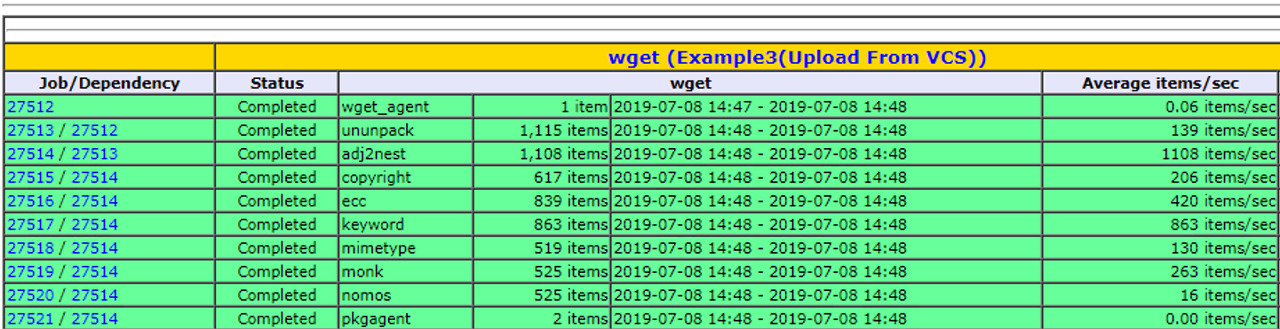
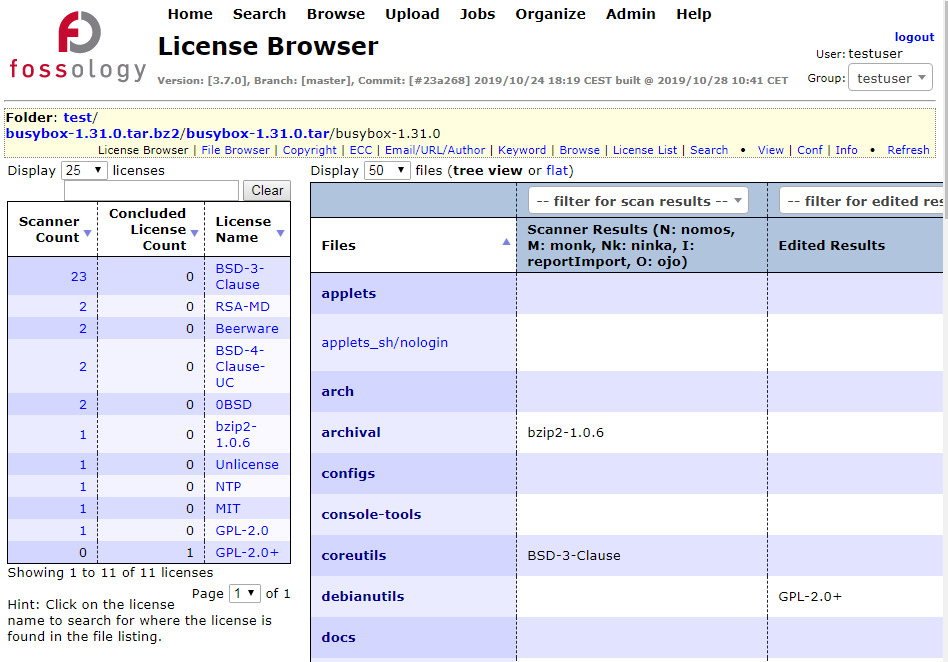
The basic usage procedure for FOSSology is as follows.
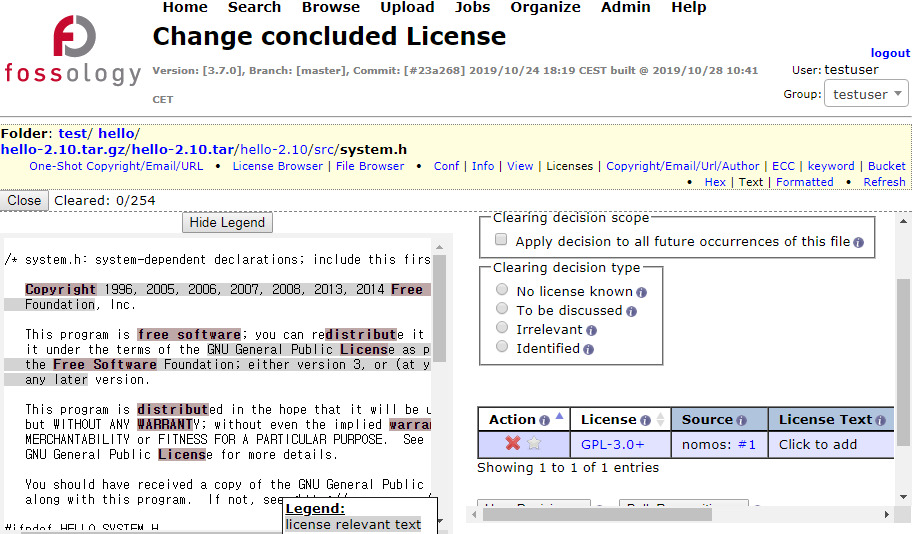
After checking whether these analysis results are valid, users can exclude incorrectly detected items from the analysis results. FOSSology describes this as the Clearing process; for more details, refer to the following page. : https://www.fossology.org/get-started/basic-workflow/
Using the method above, you can easily check what license the open source you want to use carries and what its copyright information is.
(Updated on August 29, 2023.)
A company that develops and distributes products containing open source needs to collect and track information such as the version and license of the open source used, for each product and release version. This allows the company to carry out proper open source compliance activities.
In particular, when a security vulnerability is reported for a specific open source version at NVD (https://nvd.nist.gov/vuln), a company that cannot trace which products use that version ends up unable to determine which products need the security patch applied, leaving its products exposed to the vulnerability.
This makes tracking open source information a necessity. Companies address this either by building their own system or by purchasing and using a commercial service. SW360 is open source software sponsored by the Eclipse Foundation, providing a web application and repository for collecting and tracking software Bill of Materials (BOM) information.

SW360 provides a web-based UI, and its key functions are as follows.
SW360 is composed as follows.
For details on the project structure and the software required for installation, see the Required software section of the README. : https://github.com/eclipse-sw360/sw360
SW360 offers the following installation methods. Users can choose one of them for installation.
This guide introduces the method of deploying with Docker. For details, refer to the README. : https://github.com/eclipse-sw360/sw360/blob/main/README_DOCKER.md
Download the code to build the Docker image. The tested code can be obtained here. : https://github.com/haksungjang/sw360/tree/docker_build
git clone -b docker_build https://github.com/haksungjang/sw360.git
First, install Docker. (Note that a paid purchase may be required for corporate developer use.)
Build by running docker_build.sh as shown below.
cd sw360
./docker_build.sh
Once the build completes successfully, you can check the created images as shown below.
docker image ls

REPOSITORY                       TAG              IMAGE ID       CREATED          SIZE
eclipse-sw360/sw360              18-development   ab0fd848bf80   8 minutes ago    2.95GB
eclipse-sw360/sw360              latest           ab0fd848bf80   8 minutes ago    2.95GB
ghcr.io/eclipse-sw360/sw360      18-development   ab0fd848bf80   8 minutes ago    2.95GB
ghcr.io/eclipse-sw360/sw360      latest           ab0fd848bf80   8 minutes ago    2.95GB
eclipse-sw360/binaries           18-development   aa7debf0a1fc   8 minutes ago    347MB
eclipse-sw360/binaries           latest           aa7debf0a1fc   8 minutes ago    347MB
ghcr.io/eclipse-sw360/binaries   18-development   aa7debf0a1fc   8 minutes ago    347MB
ghcr.io/eclipse-sw360/binaries   latest           aa7debf0a1fc   8 minutes ago    347MB
eclipse-sw360/base               18-development   e5147733fc88   37 minutes ago   1.52GB
eclipse-sw360/base               latest           e5147733fc88   37 minutes ago   1.52GB
ghcr.io/eclipse-sw360/base       18-development   e5147733fc88   37 minutes ago   1.52GB
ghcr.io/eclipse-sw360/base       latest           e5147733fc88   37 minutes ago   1.52GB
ghcr.io/eclipse-sw360/thrift     0.18.1           0012d7998058   4 weeks ago      152MB
ghcr.io/eclipse-sw360/thrift     latest           0012d7998058   4 weeks ago      152MB
eclipse-sw360/thrift             0.18.1           0012d7998058   4 weeks ago      152MB
eclipse-sw360/thrift             latest           0012d7998058   4 weeks ago      152MB
Run the created images with the docker-compose up command.
docker-compose up
Once it runs successfully, you can see three containers running as shown below.
docker ps

CONTAINER ID   IMAGE                 COMMAND                  CREATED         STATUS                   PORTS                                              NAMES
4299fd39010c   eclipse-sw360/sw360   "/app/entry_point.sh"    3 minutes ago   Up 3 minutes             0.0.0.0:8080->8080/tcp, 0.0.0.0:11311->11311/tcp   sw360
13fd5696b140   postgres:14           "docker-entrypoint.s…"   3 minutes ago   Up 3 minutes (healthy)   0.0.0.0:5438->5432/tcp                             sw360-postgresdb-1
7bb70f2daaf4   couchdb               "tini -- /docker-ent…"   3 minutes ago   Up 3 minutes (healthy)   4369/tcp, 9100/tcp, 0.0.0.0:5984->5984/tcp         sw360-couchdb-1
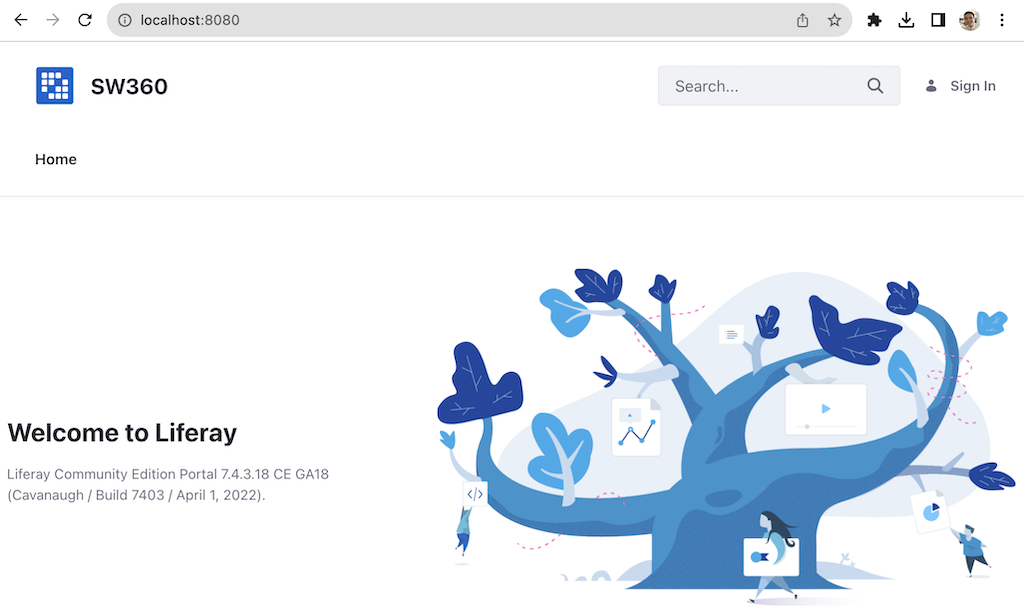
At this point, accessing http://localhost:8080/ takes you to the following screen.
After installing SW360 successfully, you need to perform the initial configuration following the procedure below. For details, see: SW360 Initial Setup Configuration
Log in with the following account to perform the configuration.
Once you log in, a Not Found message appears as shown below.
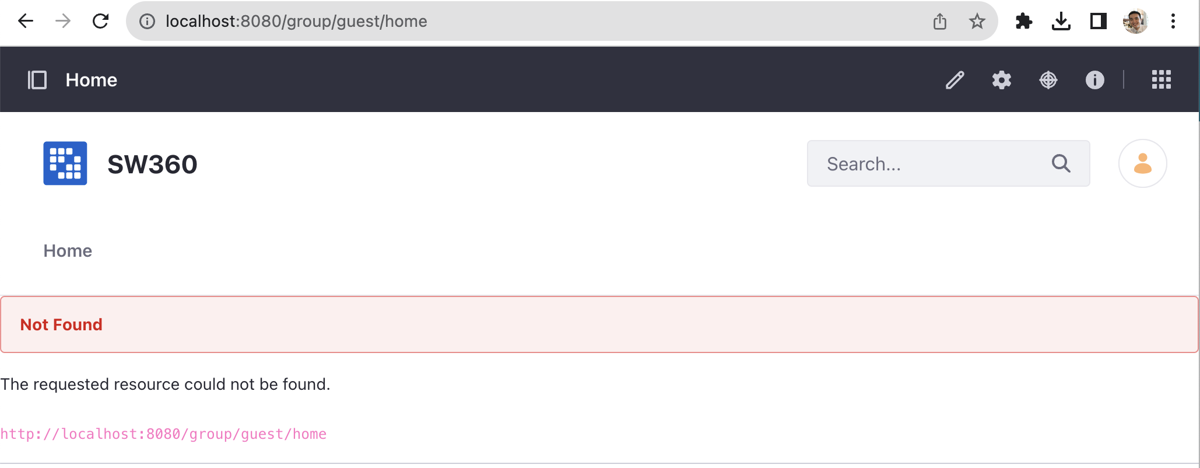
Click the item icon (cube shape) in the upper right of the screen and select the Control Panel tab.
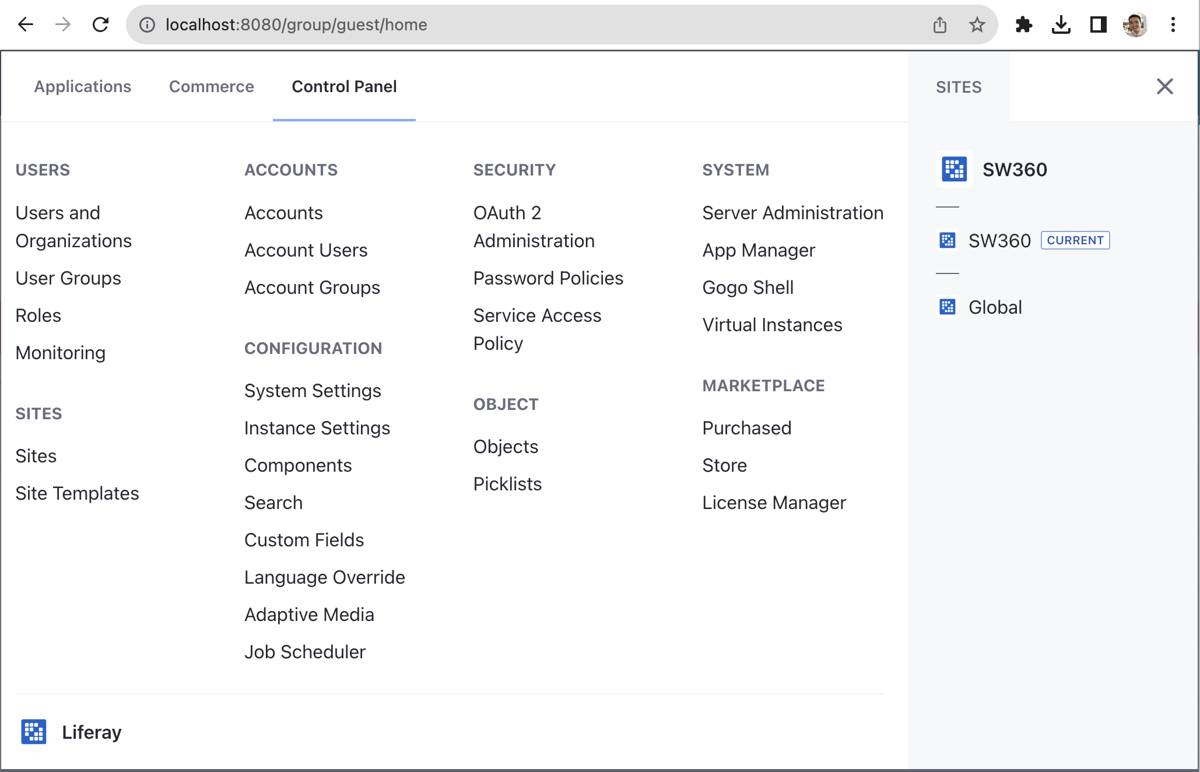
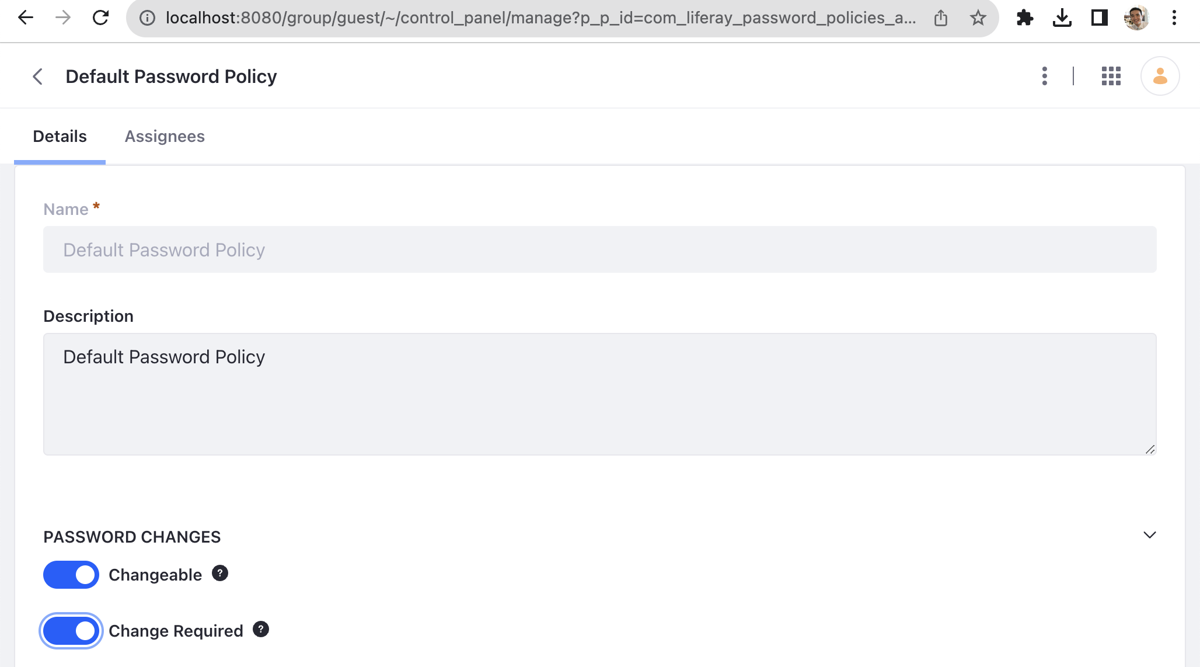
Enable SECURITY > Password Policies > Default Password Policy > PASSWORD CHANGES > Change Requried.
Then, back in the Control Panel tab, select CONFIGURATION > Instance Settings. This shows the PLATFORM menu.
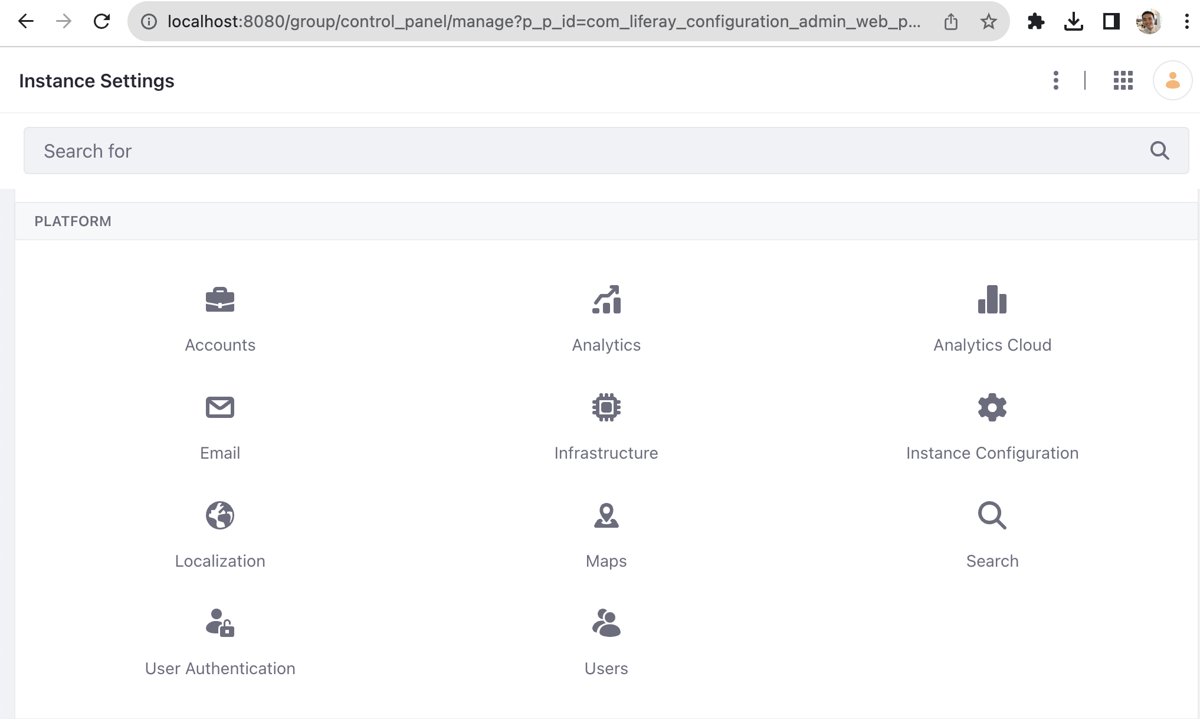
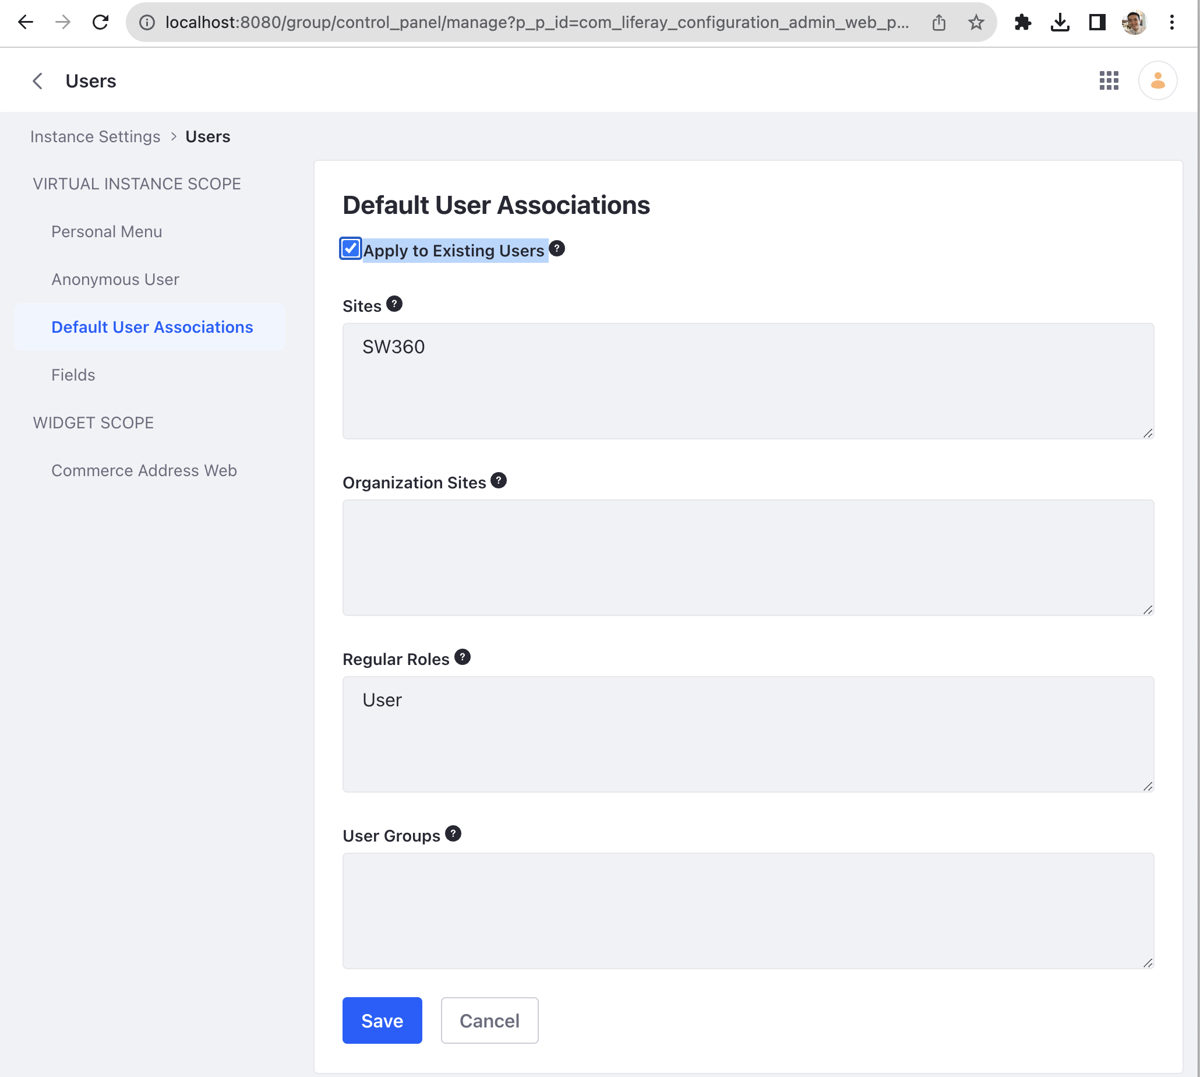
There, select Users. Then go into the Default User Associations menu, check Apply to Existing Users, and Save.
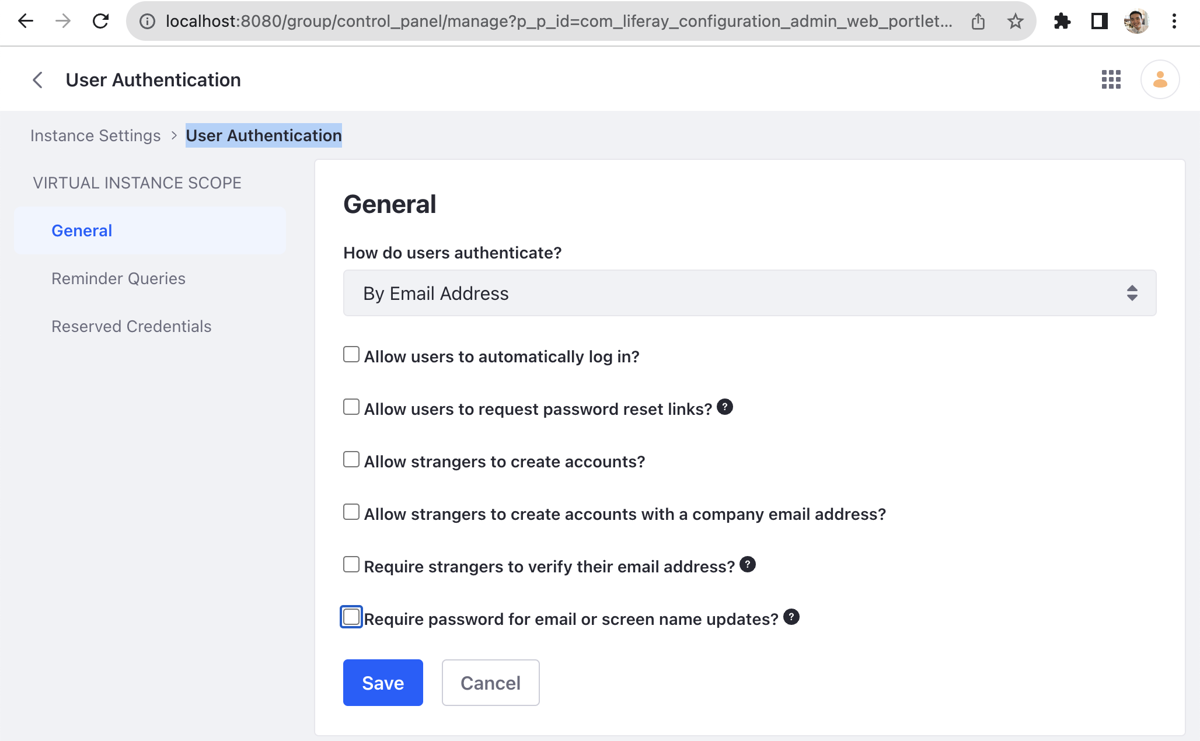
Now, under Instance Settings > PLATFORM, select User Authentication. Go into General and uncheck all items. (You can check and enable any items needed for administrative purposes.) Then Save.
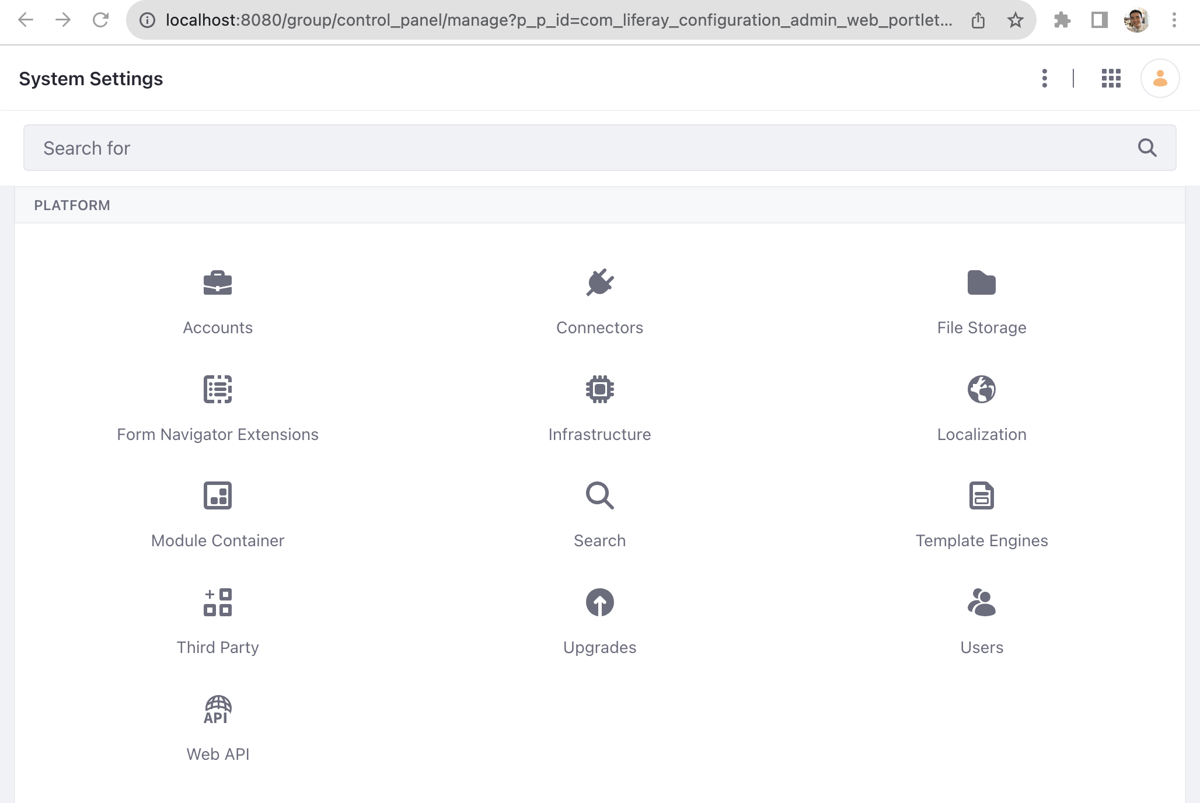
Finally, you need to enable jQuery and Font Awesome. To do this, go into CONFIGURATION > System Settings in the Control Panel tab, where you can find Third Party under PLATFORM.
Go into Third Party and enable JQuery and Font Awesome respectively.
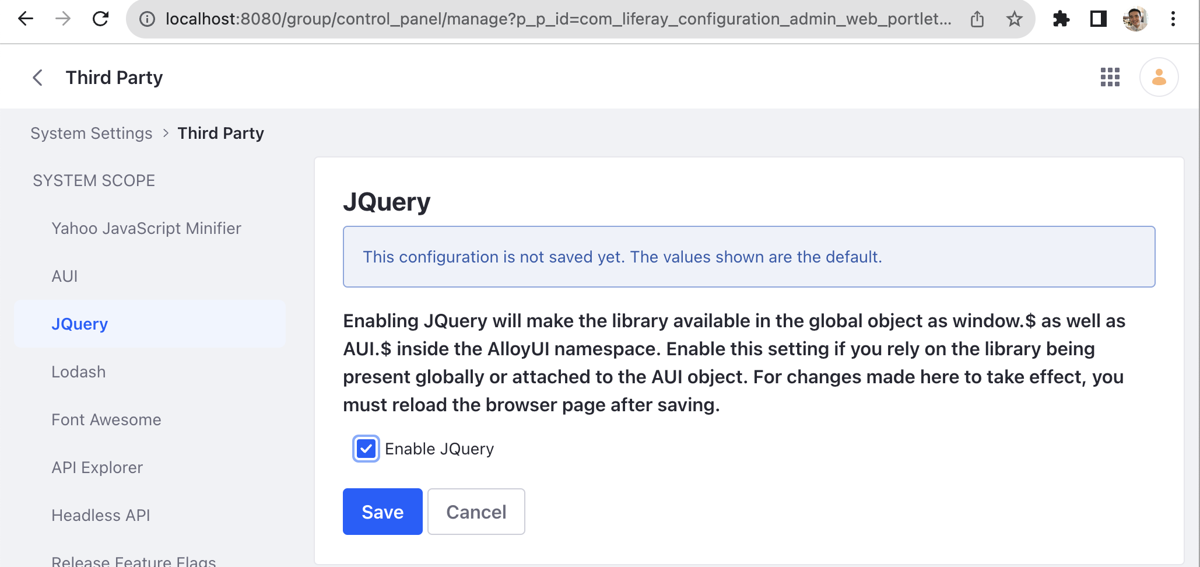
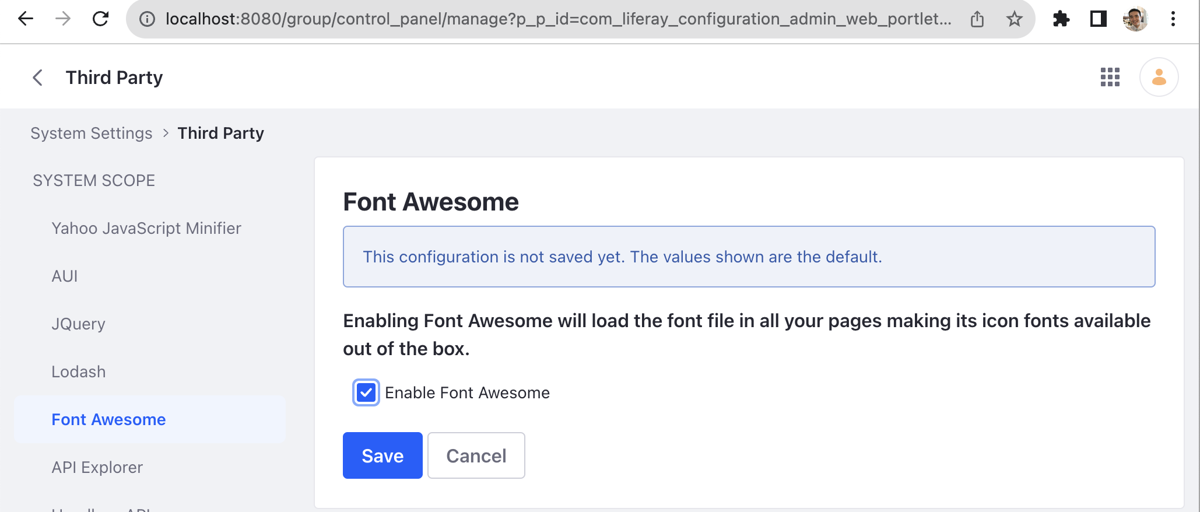
Restart your browser for the changes to take effect.
To configure SW360, you need to import the *.lar files. To do this, you need to go into the menu, and the menu button is in the upper left of the screen.
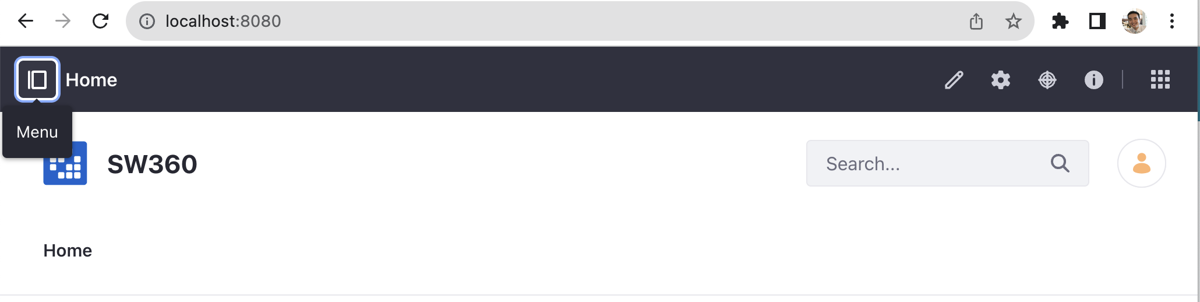
In the menu, go into Publishing > Import.
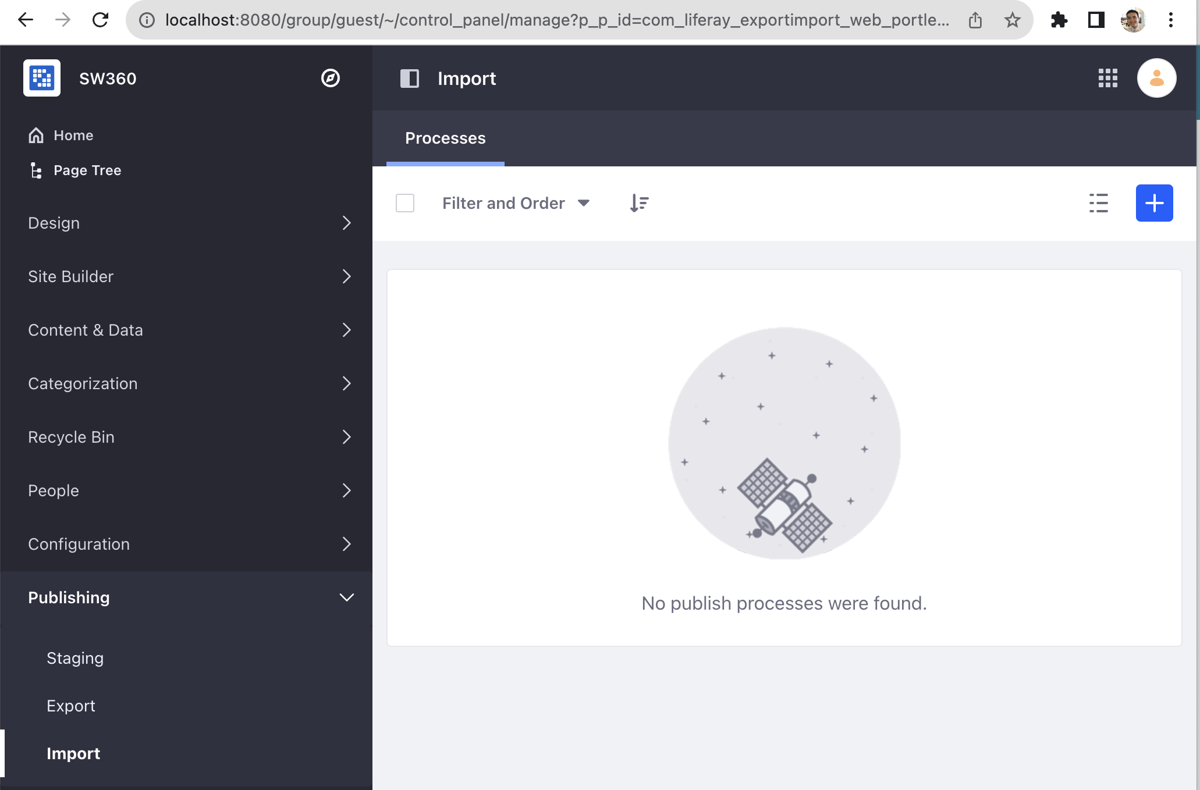
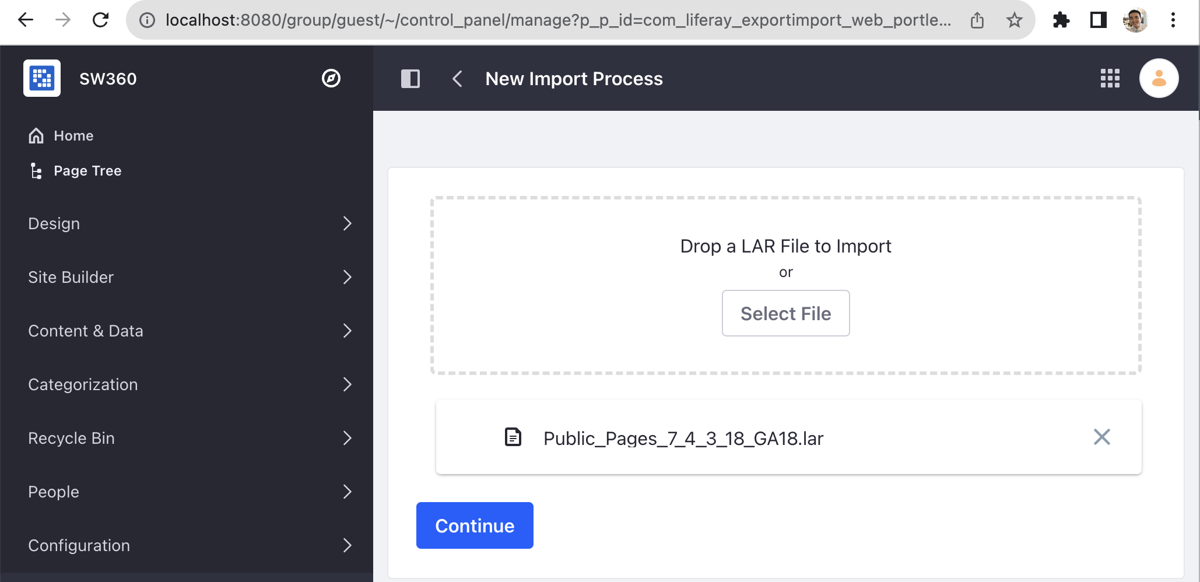
Click the + button on the right to upload a LAR file. The LAR files are located under the frontend/configuration folder in the SW360 source files. (e.g., https://github.com/haksungjang/sw360/tree/docker_build/frontend/configuration)
First, upload the Public_Pages_7_4_3_18_GA18.lar file and click the Continue button.
On the File Summary screen, you can see the details of the uploaded LAR file.
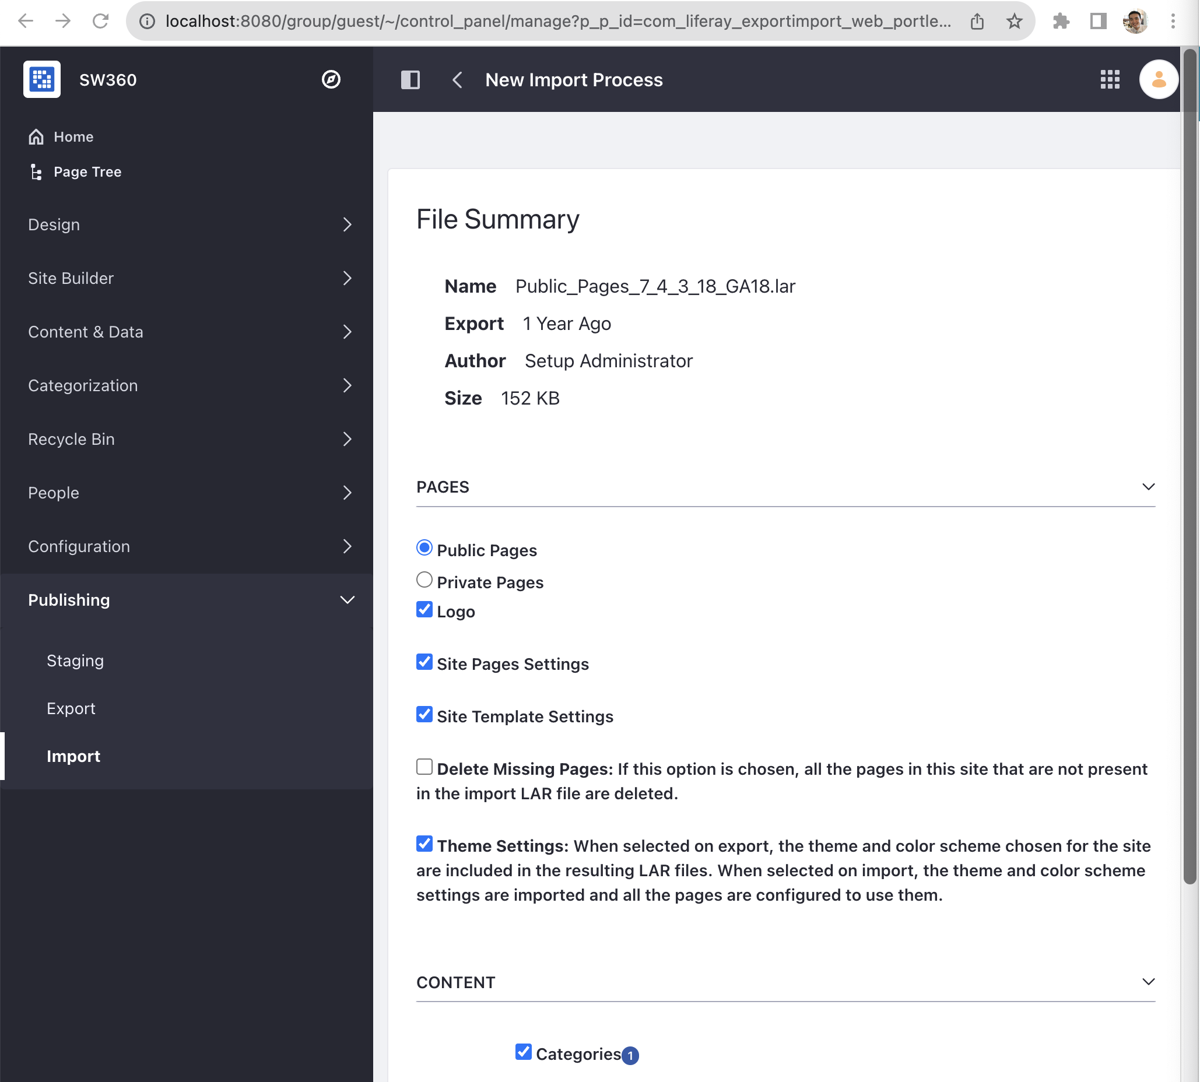
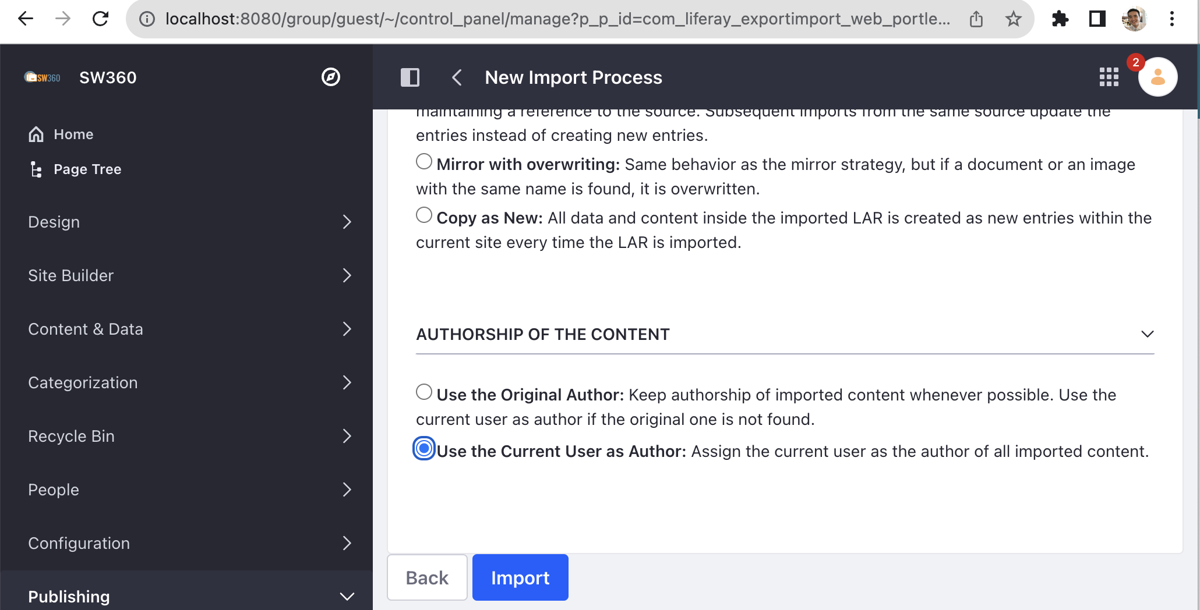
Change AUTHORSHIP OF THE CONTENT at the bottom to Use the Current User as Author and click the Import button.
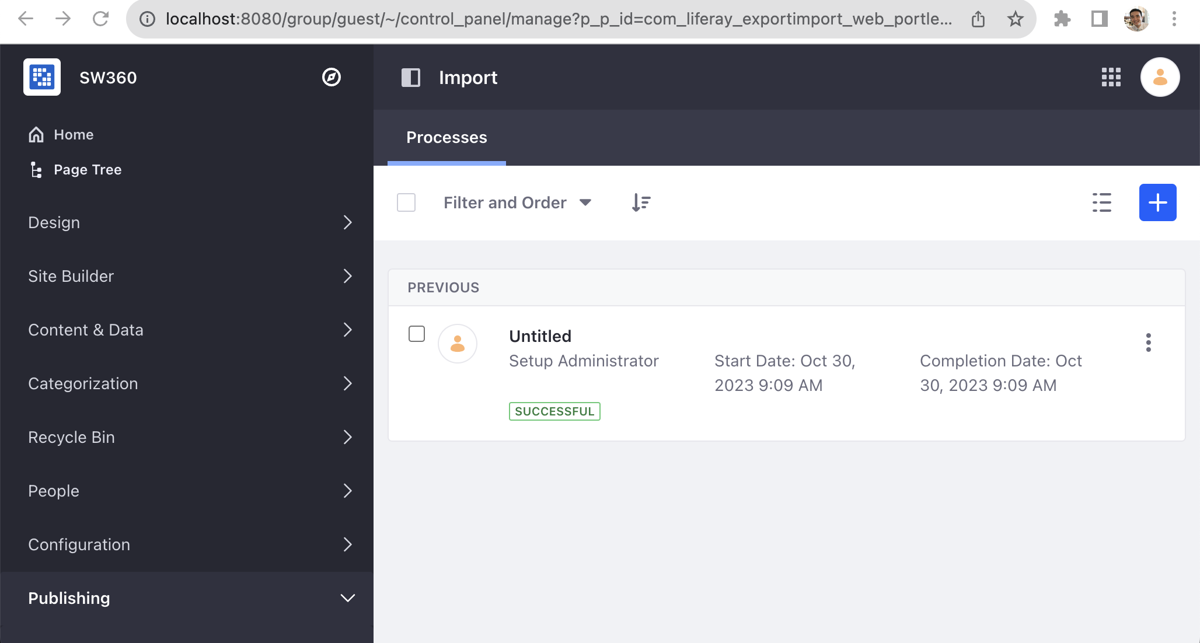
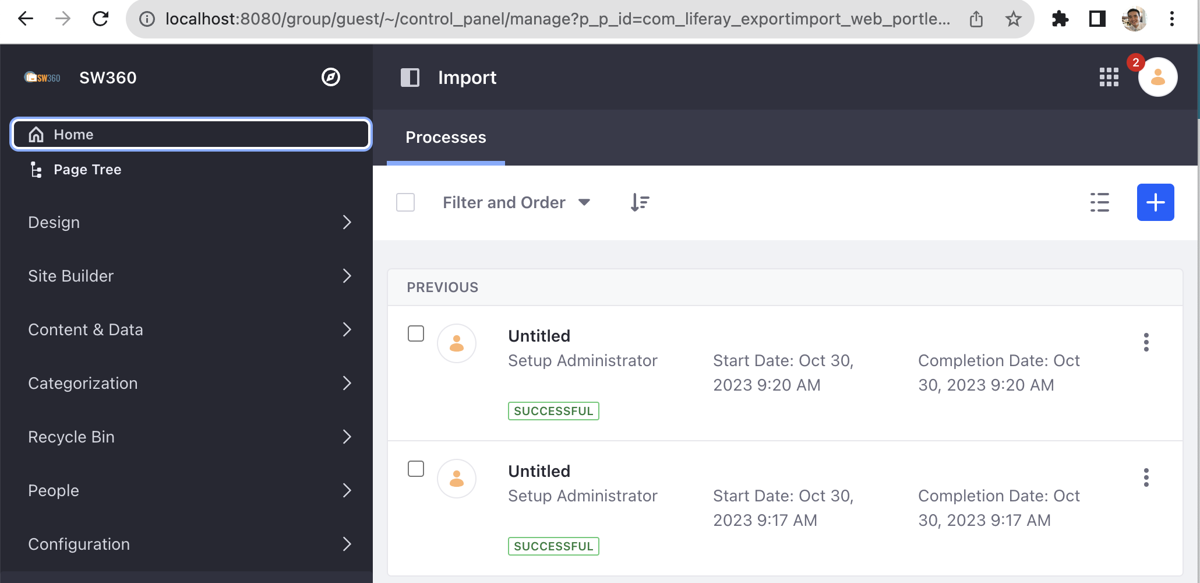
You can then see that the import completed successfully.
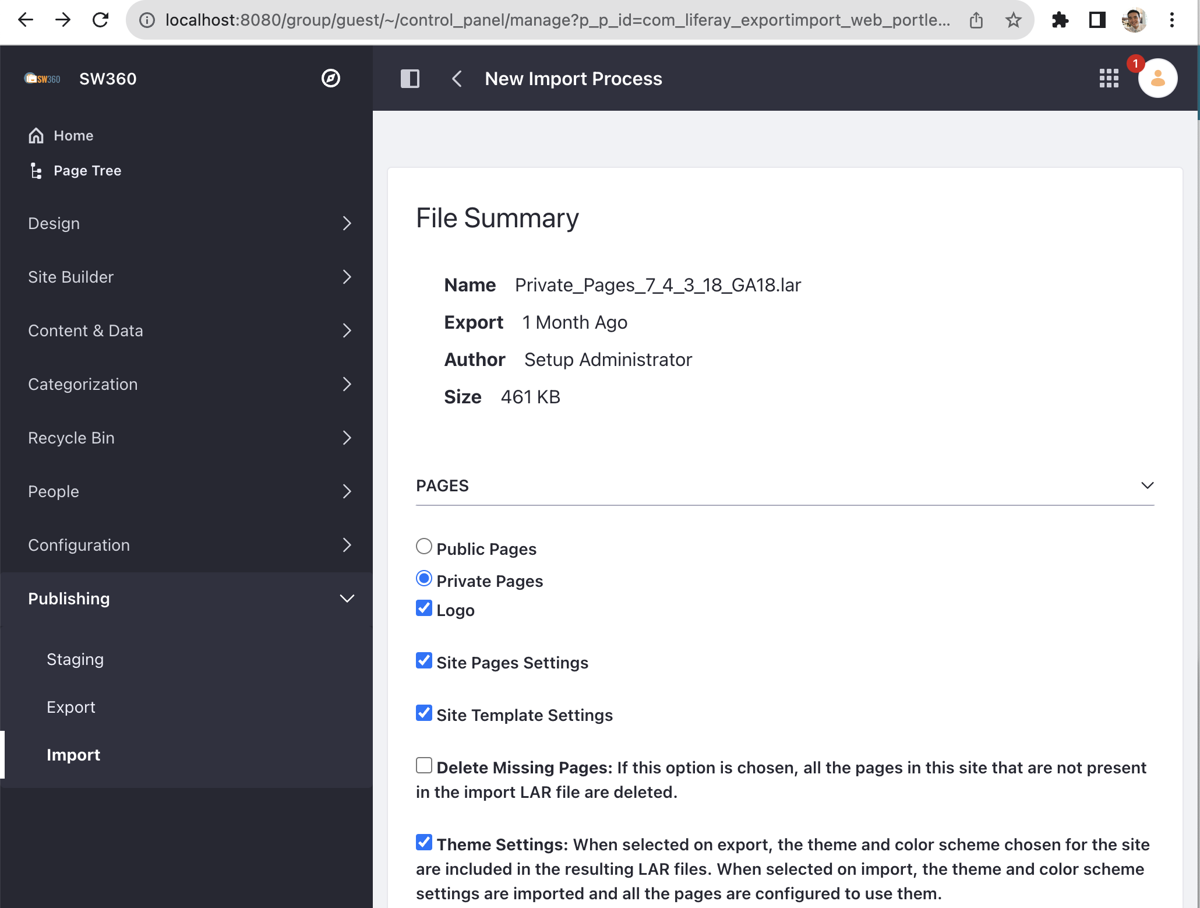
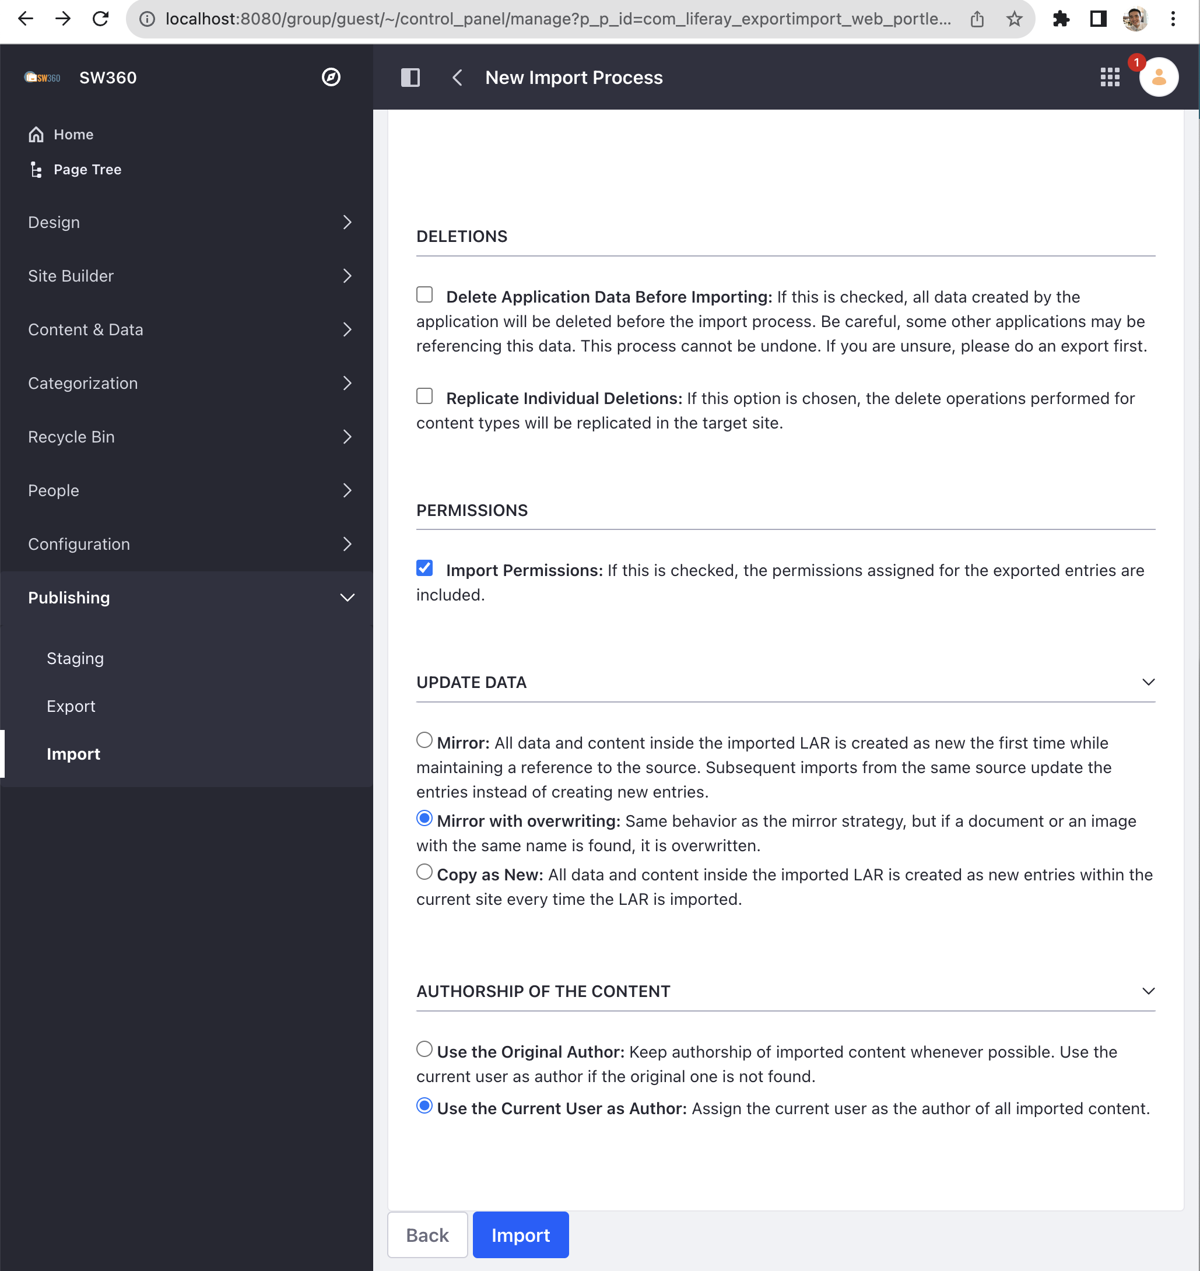
Similarly, import the Private_Pages_7_4_3_18_GA18.lar file. On the File Summary screen, change PAGES > Private Pages as shown below.
Then select the PERMISSIONS, UPDATE DATA, and AUTHORSHIP OF THE CONTENT items as shown in the image below, and click the Import button to perform the import.
After completing this, click the Home button at the top of the menu.
This takes you to the Welcome to SW360! screen shown below.
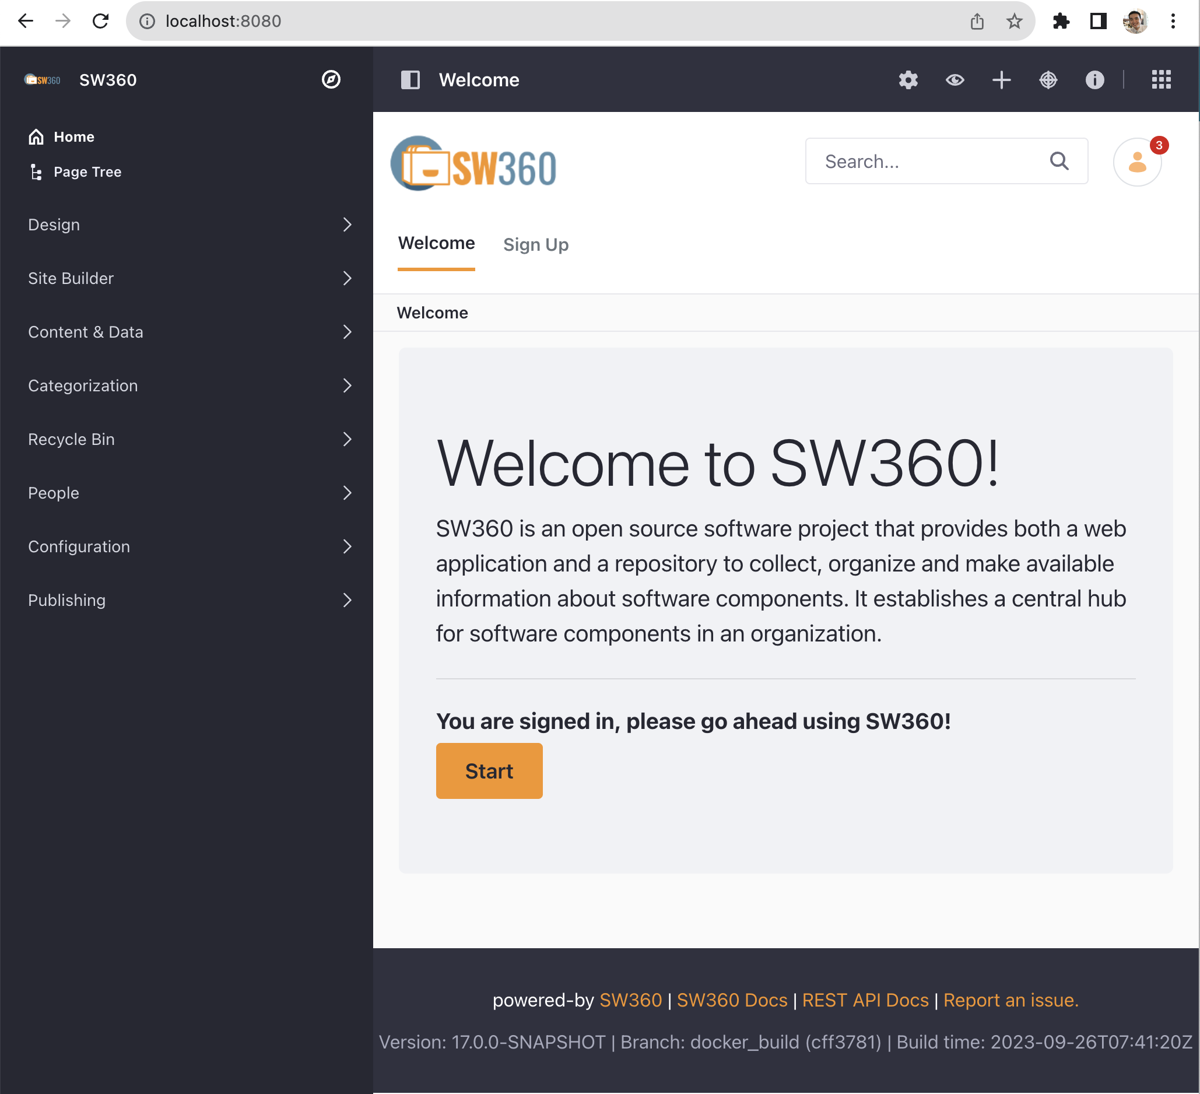
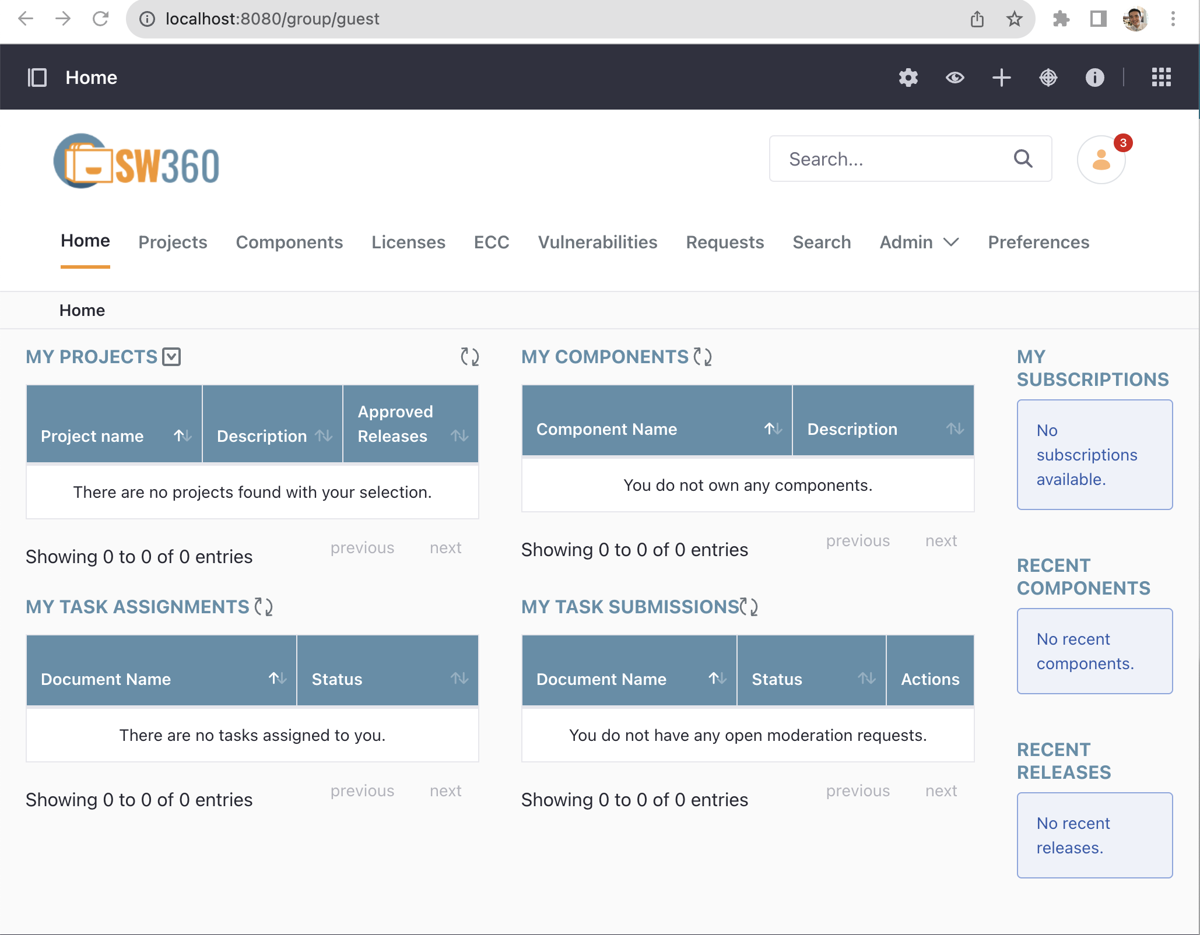
Click the Start button to go into the SW360 main screen. (All items are empty at this point.)
In the SW360 menu, select Admin > User.
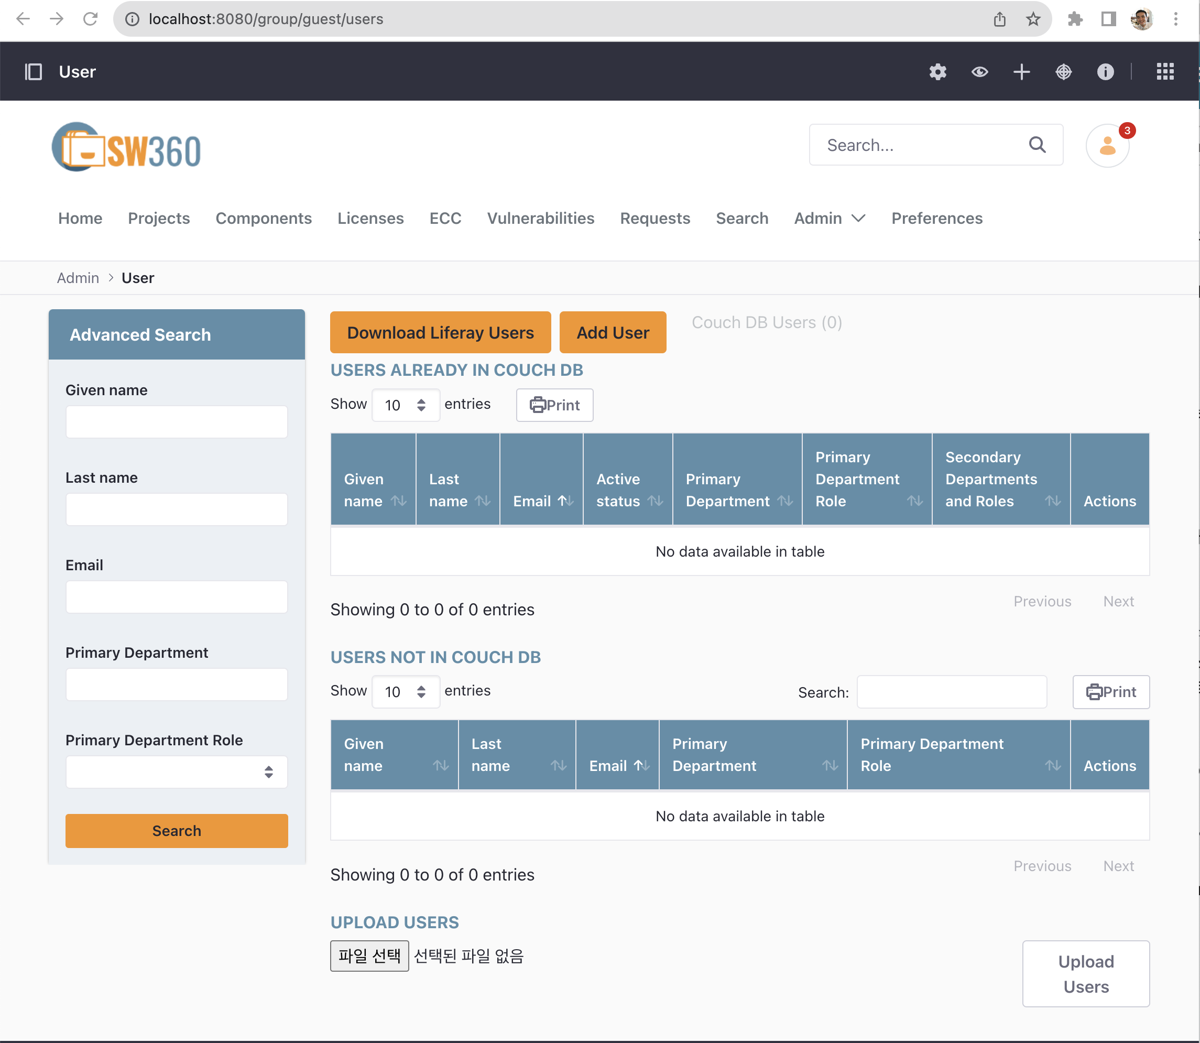
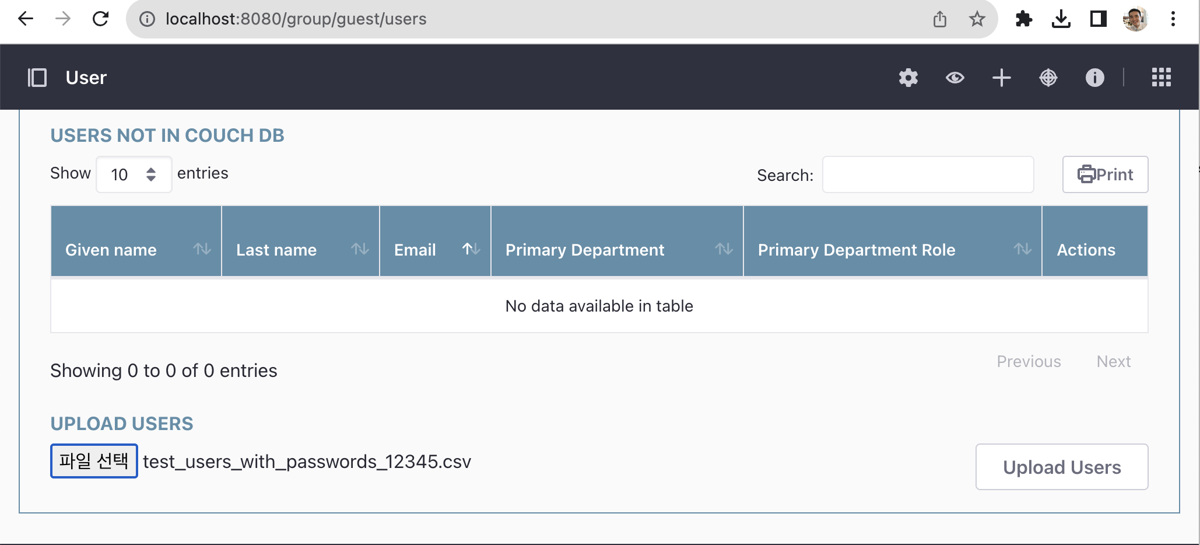
In the UPLOAD USERS menu at the bottom of the screen, upload the user list for testing. (The user list for testing can be downloaded here. : test_users_with_passwords_12345.csv )
You can then see that a list of 9 users has been uploaded, as shown below.
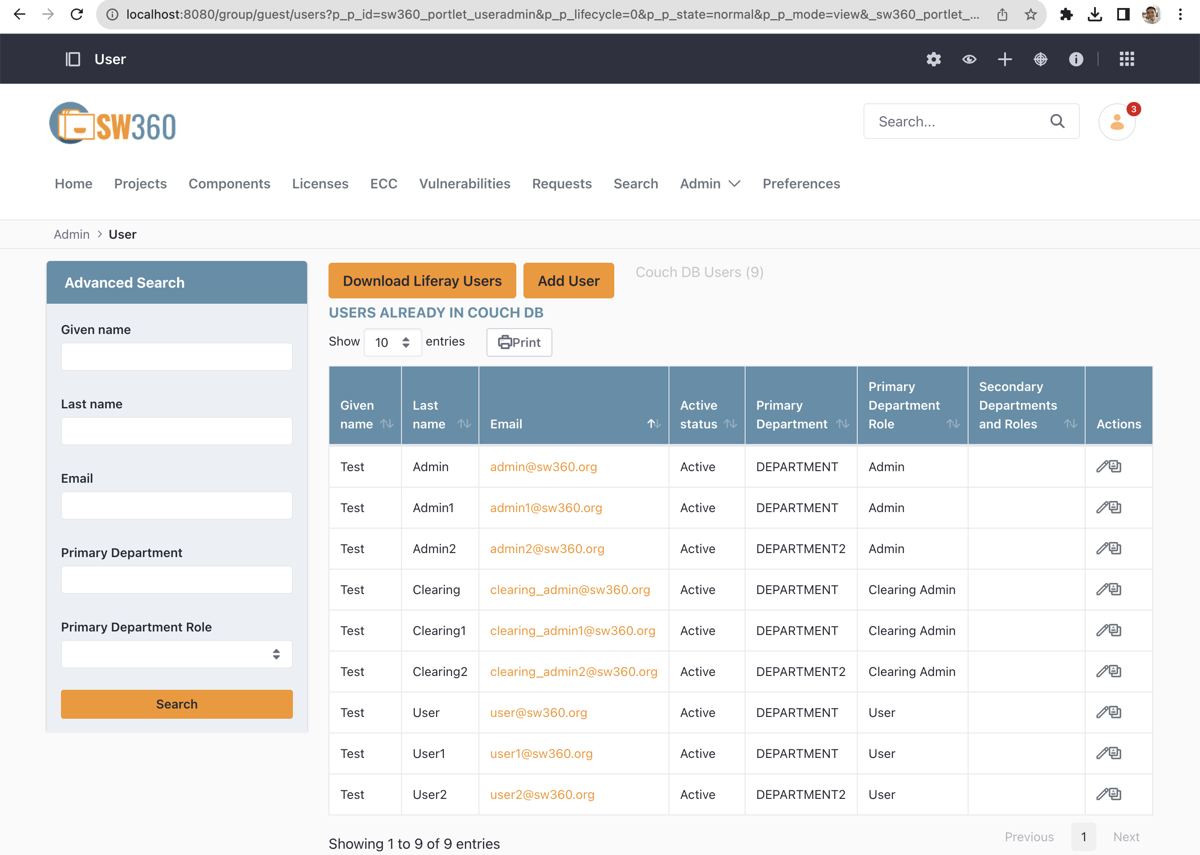
Try logging in again with the user@@sw360.org account, one of the users shown in the list. The password is 12345.
When you first install SW360, you need to first register the open source licenses you use frequently. A license includes the following information.
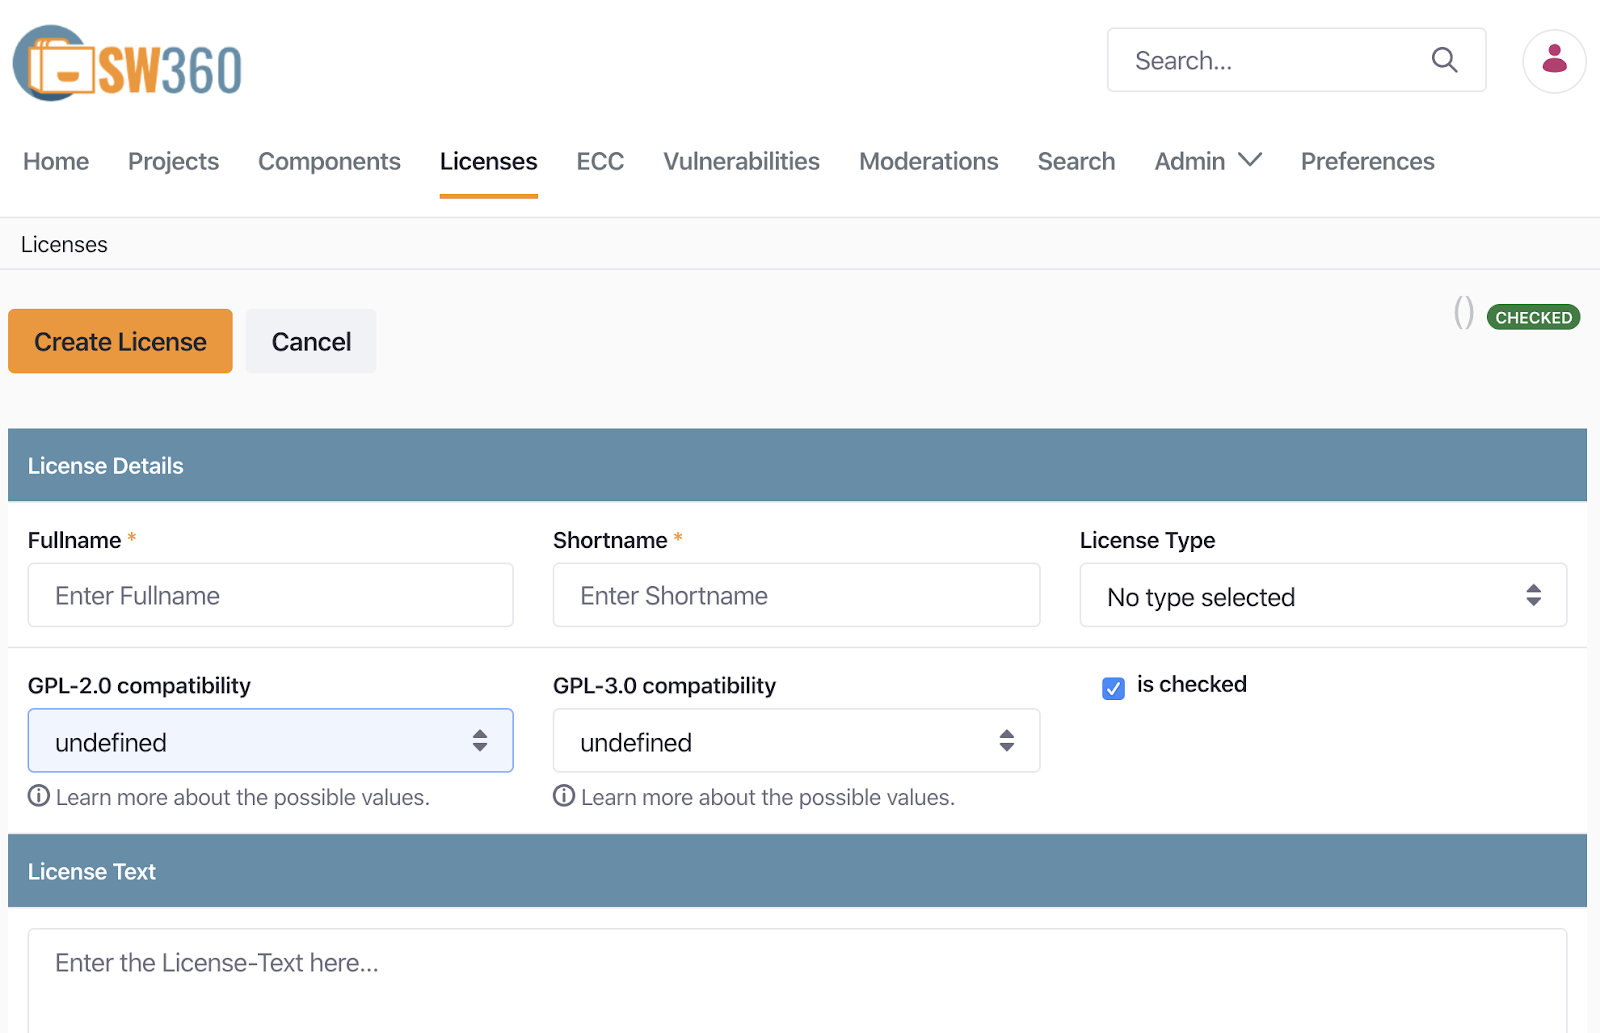
Selecting Menu > Licenses > Add License takes you to the Create License screen shown below.
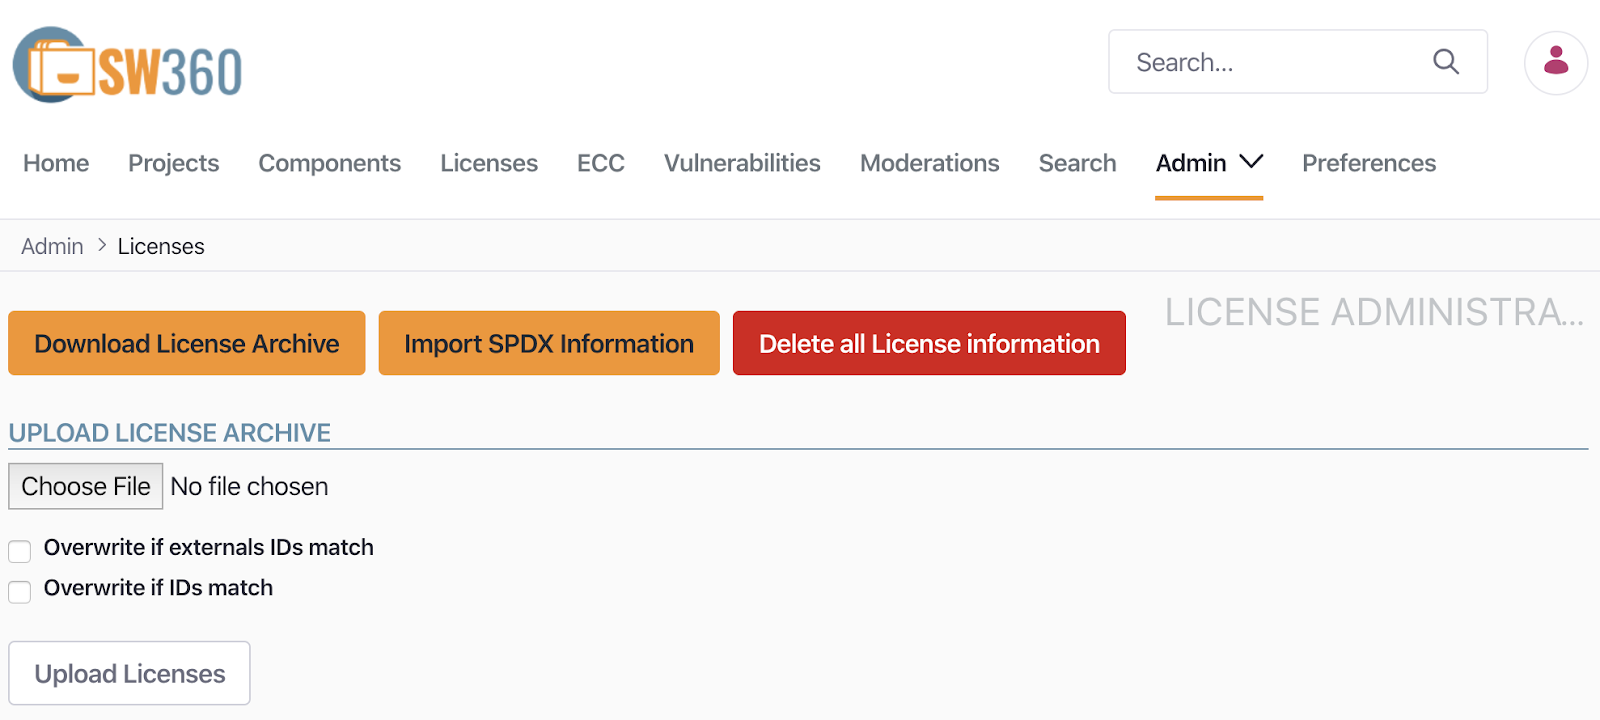
Registering licenses one by one manually like this can be quite tedious, but fortunately SW360 provides a feature to import the SPDX License List all at once. Click Menu > Admin < Import SPDX Information.
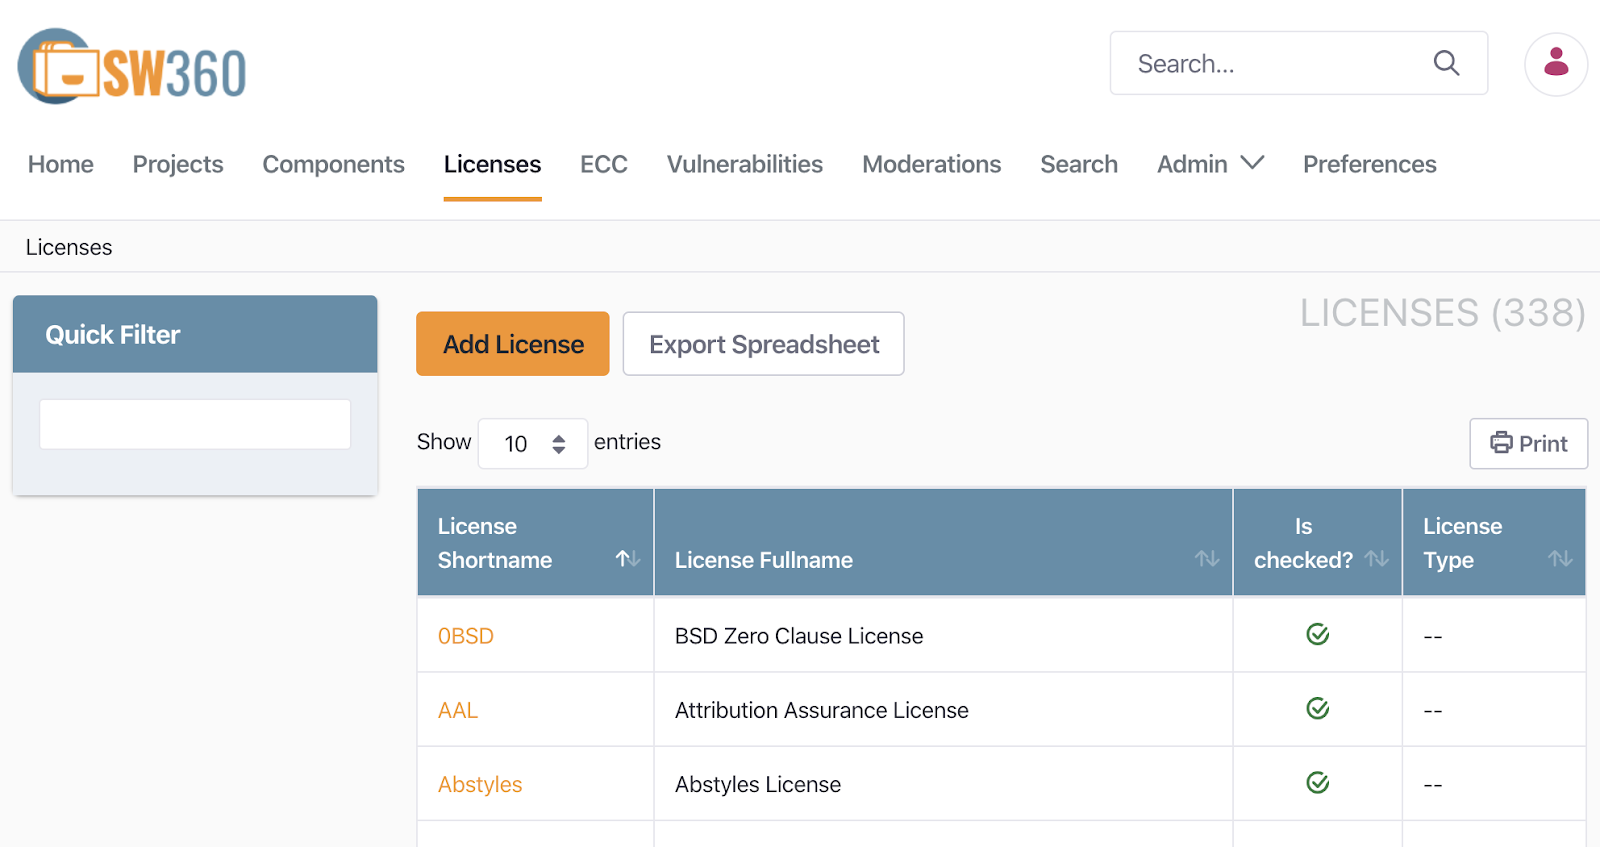
The SPDX License List is then automatically registered shortly after. At Menu > Licenses, you can confirm that 338 licenses have been registered.
In SW360, a Component is a single unit of software. Various forms of software can fall into this category, for example:
A Component includes the following information.
A Release is the unit that refers to a single Version within a Component. Accordingly, one Component can have multiple Releases. A Release is created and managed under a single Component.
A Release includes the following information.
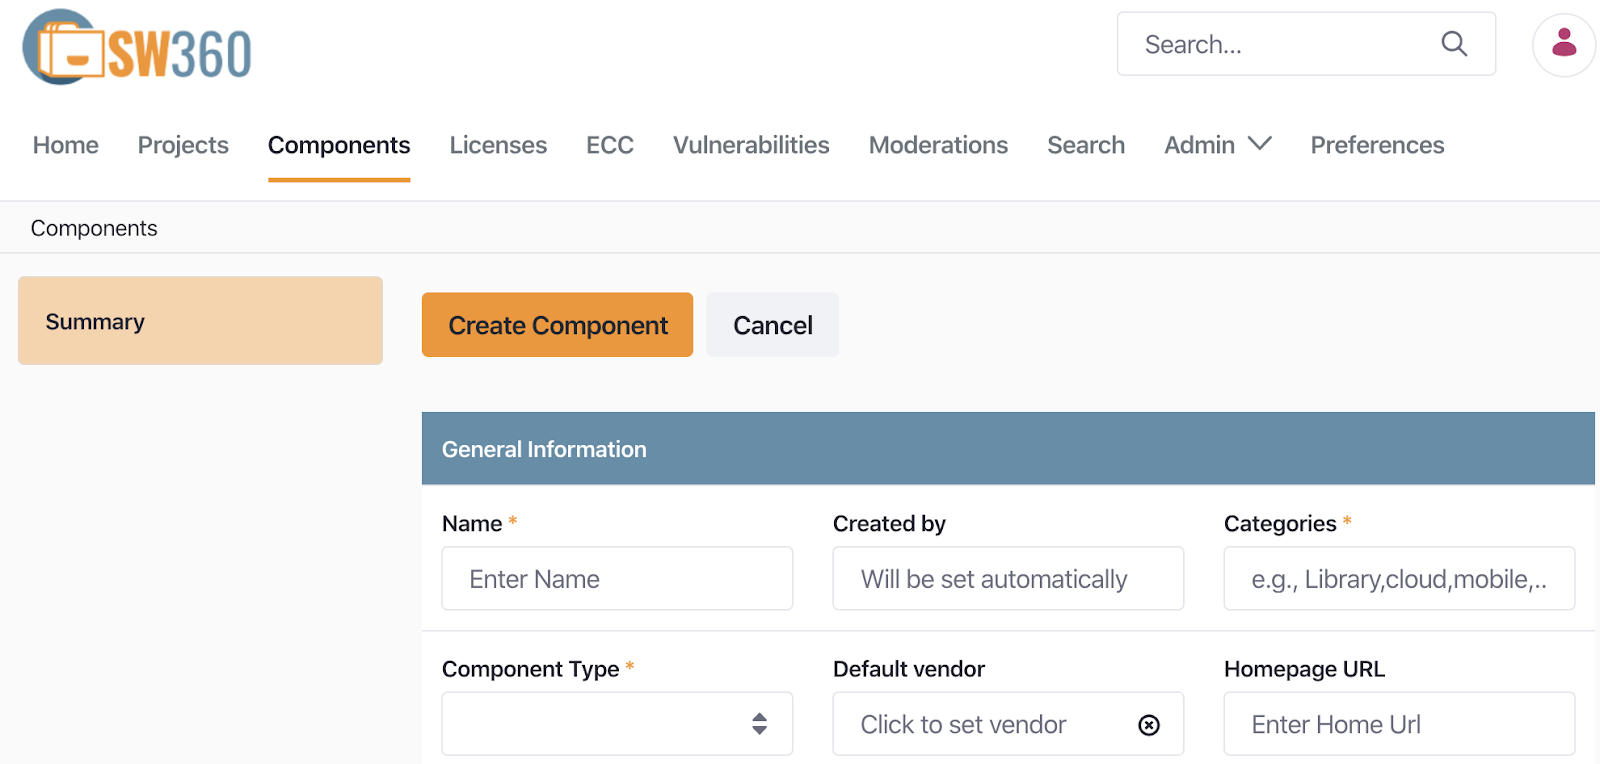
For example, if you need to register zlib-1.2.8, you first register zlib as a Component, then register zlib 1.2.8 as a Release. Selecting Menu > Components > Add Component takes you to the Create Component screen, where you can register information about zlib.
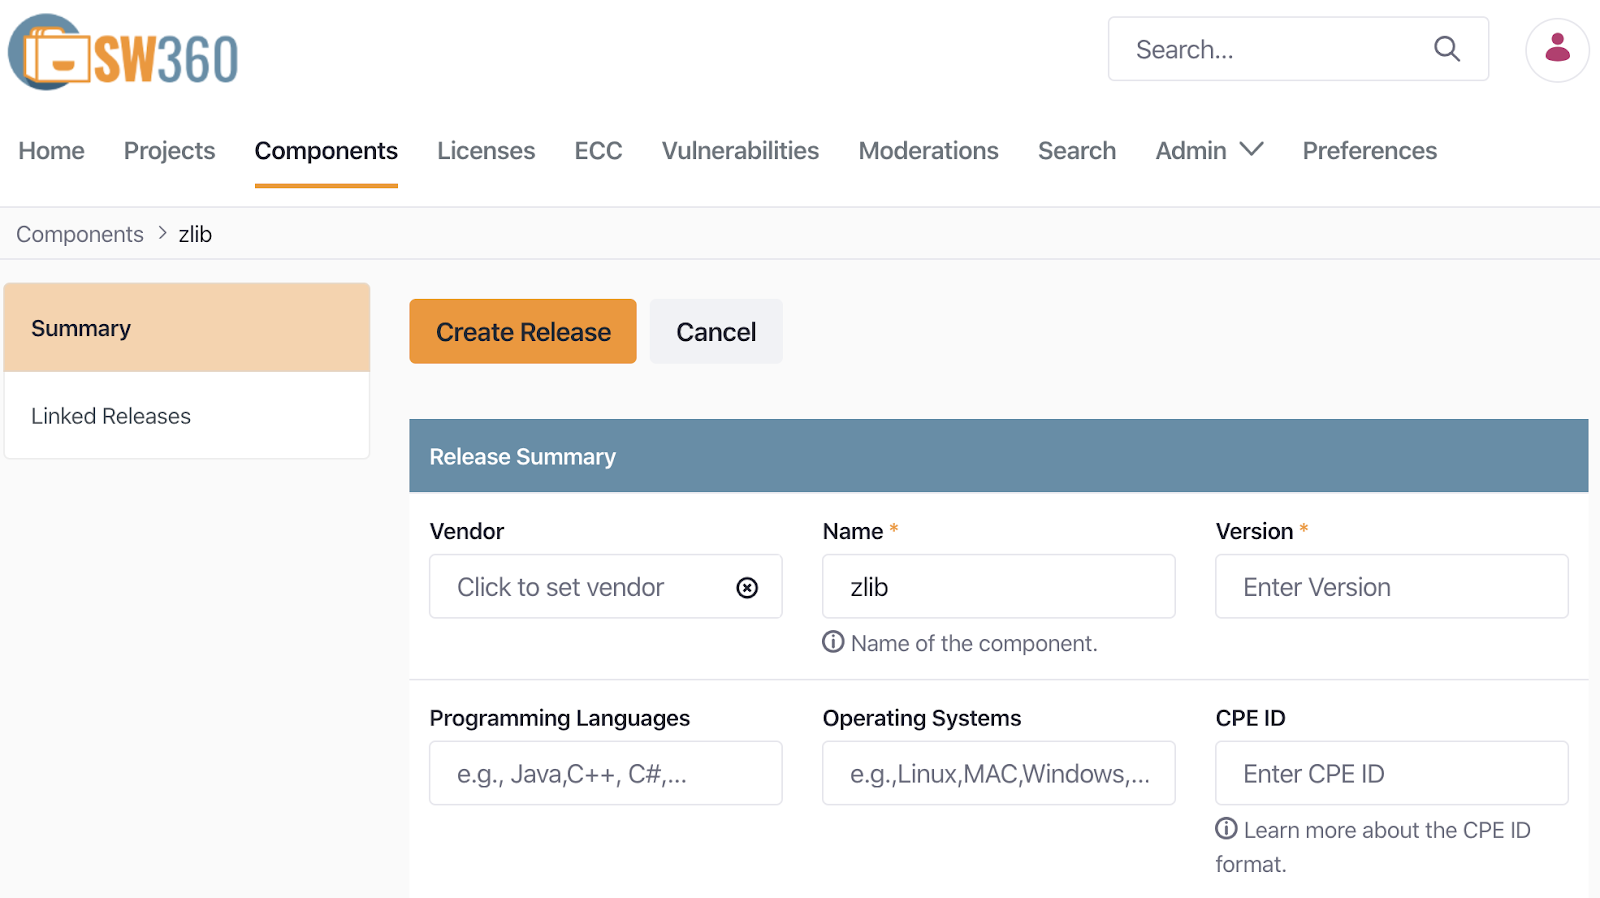
Once you create the Component, you can register information for the zlib-1.2.8 version at Components > Releases > Add Release.
When versions 1.2.8 and 1.2.11 are each registered as Releases under the single zlib Component, the Release Overview screen shows 2 Releases existing, as below.
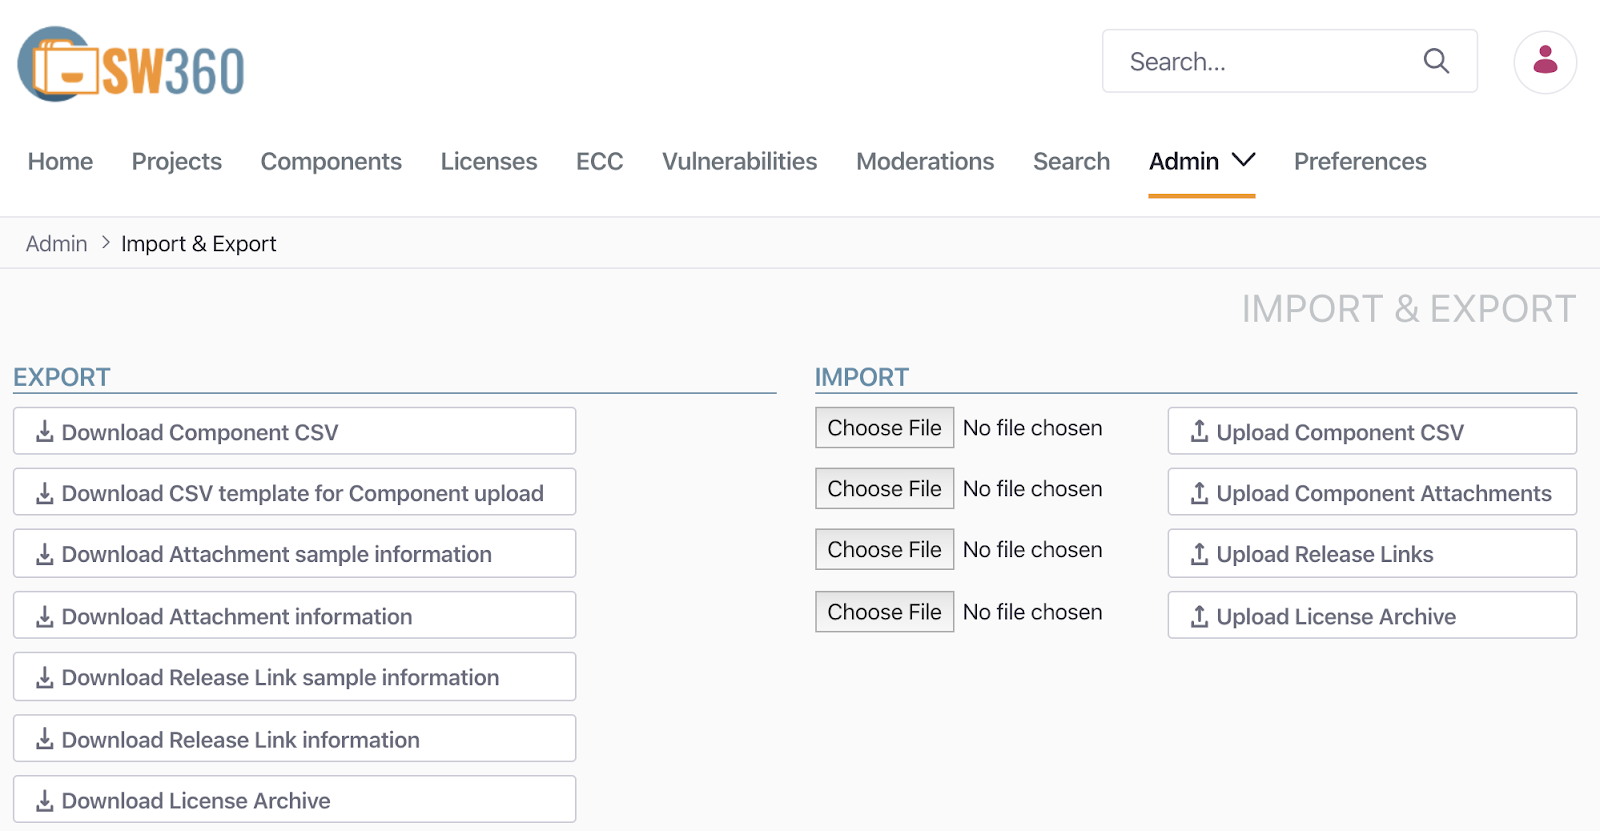
SW360 provides a feature for importing information for multiple Components at once. At Menu > Admin > Import / Export, you can enter the Component information you want to register into the CSV template and then import it.
Note that, as of February 2020, this feature may not yet work reliably.
A Project refers to a single product. Depending on the type of business, it may be a product, a service, or software. Under a Project, you register and manage the Components/Releases used in the product.
When creating a Project, you register the following information.
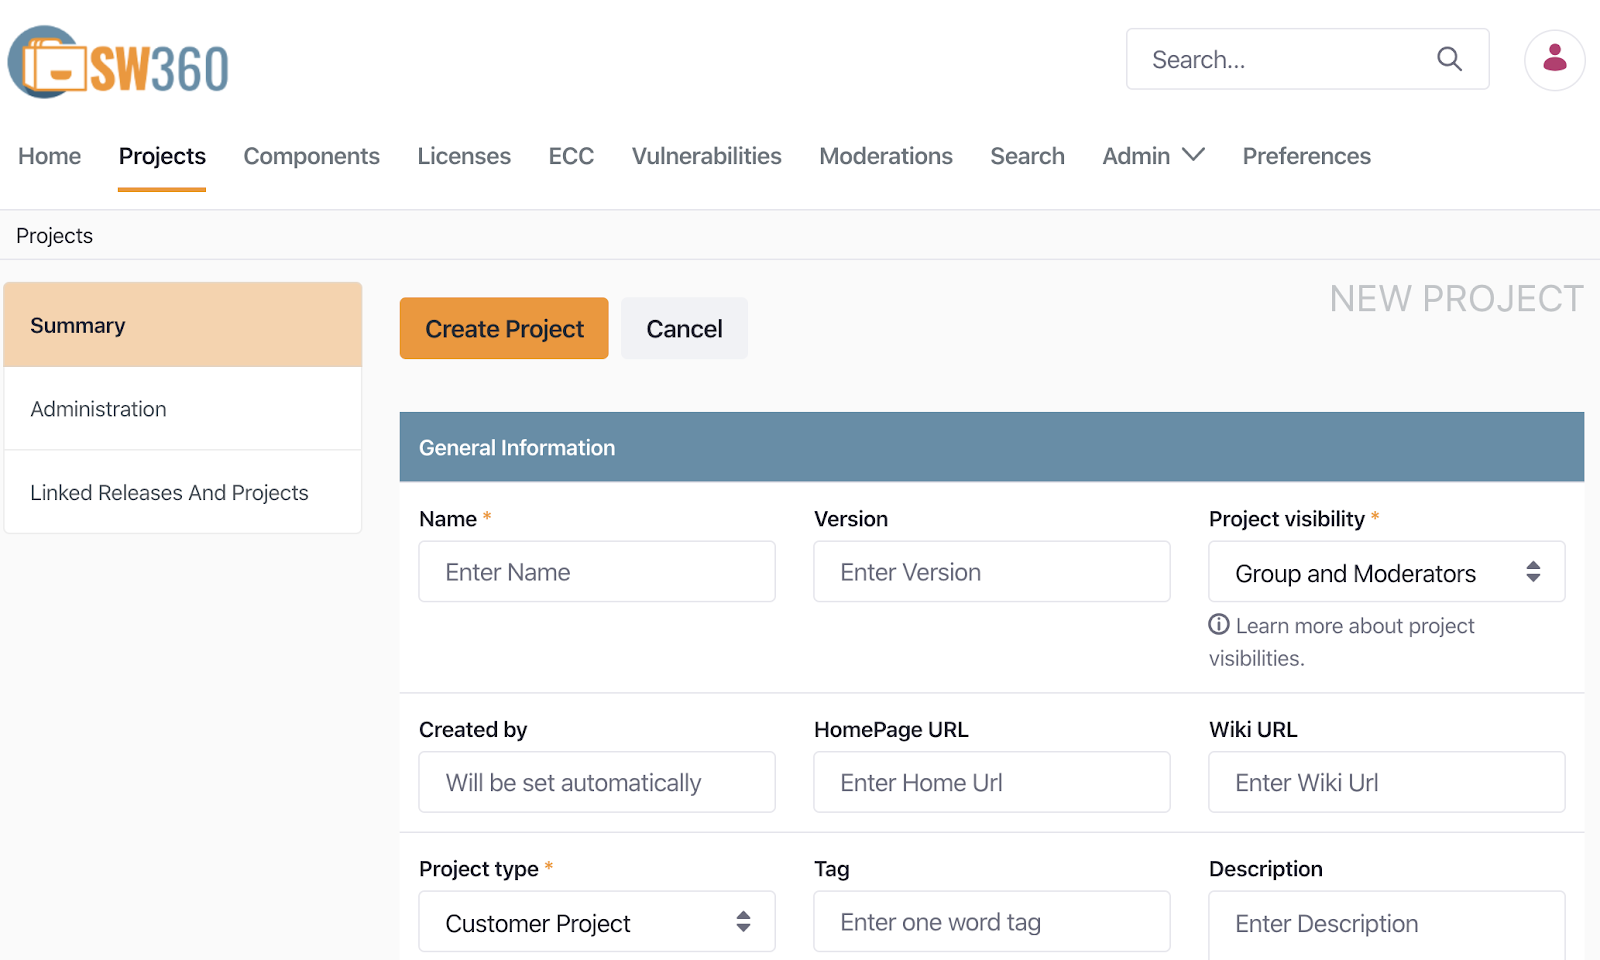
You can create a Project via Menu > Projects > Add Project.
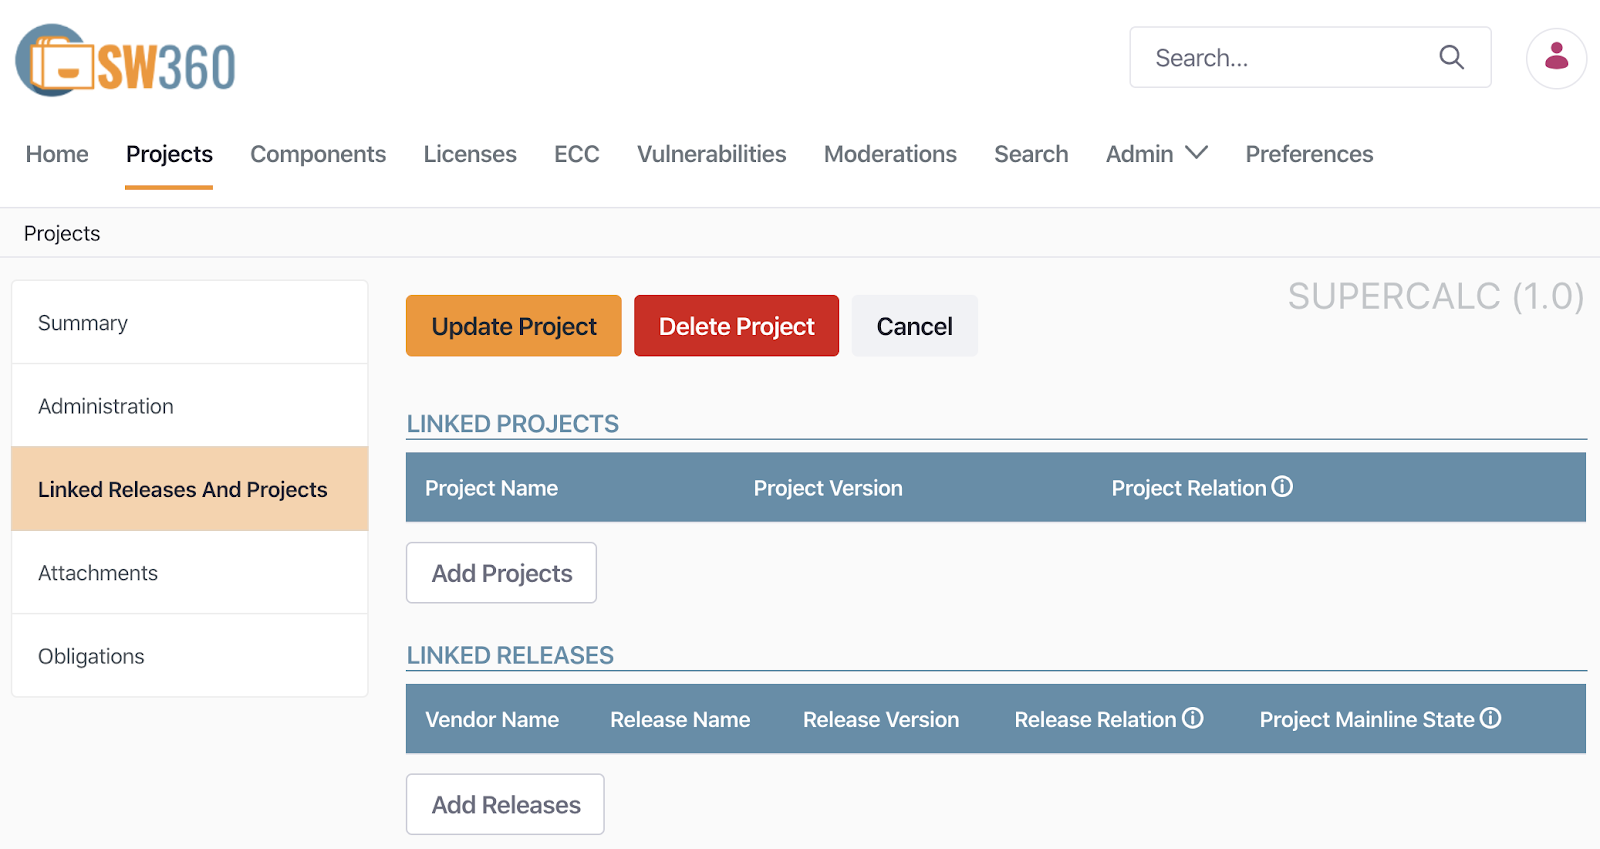
Once you create the Project, register the Releases or sub-Projects it includes. Selecting the Project at Menu > Projects lets you register Linked Projects and Linked Releases under “Linked Releases and Projects.”
The following is the screen after registering OpenSSL 1.0.1 and zlib 1.2.8 as Linked Releases in a Project named SuperCalc.
SW360 can automatically check whether registered Releases have security vulnerabilities. To do this, SW360 provides a feature for scheduling periodic collection of CVE information. At Menu > Admin > Schedule, you can set a schedule to collect CVE SEARCH information every 24 hours.
Once this schedule is set, SW360 collects CVE information from the CVE Search site (https://cve.circl.lu/) at the scheduled time. The collected CVE information can be checked at Menu > Vulnerabilities.
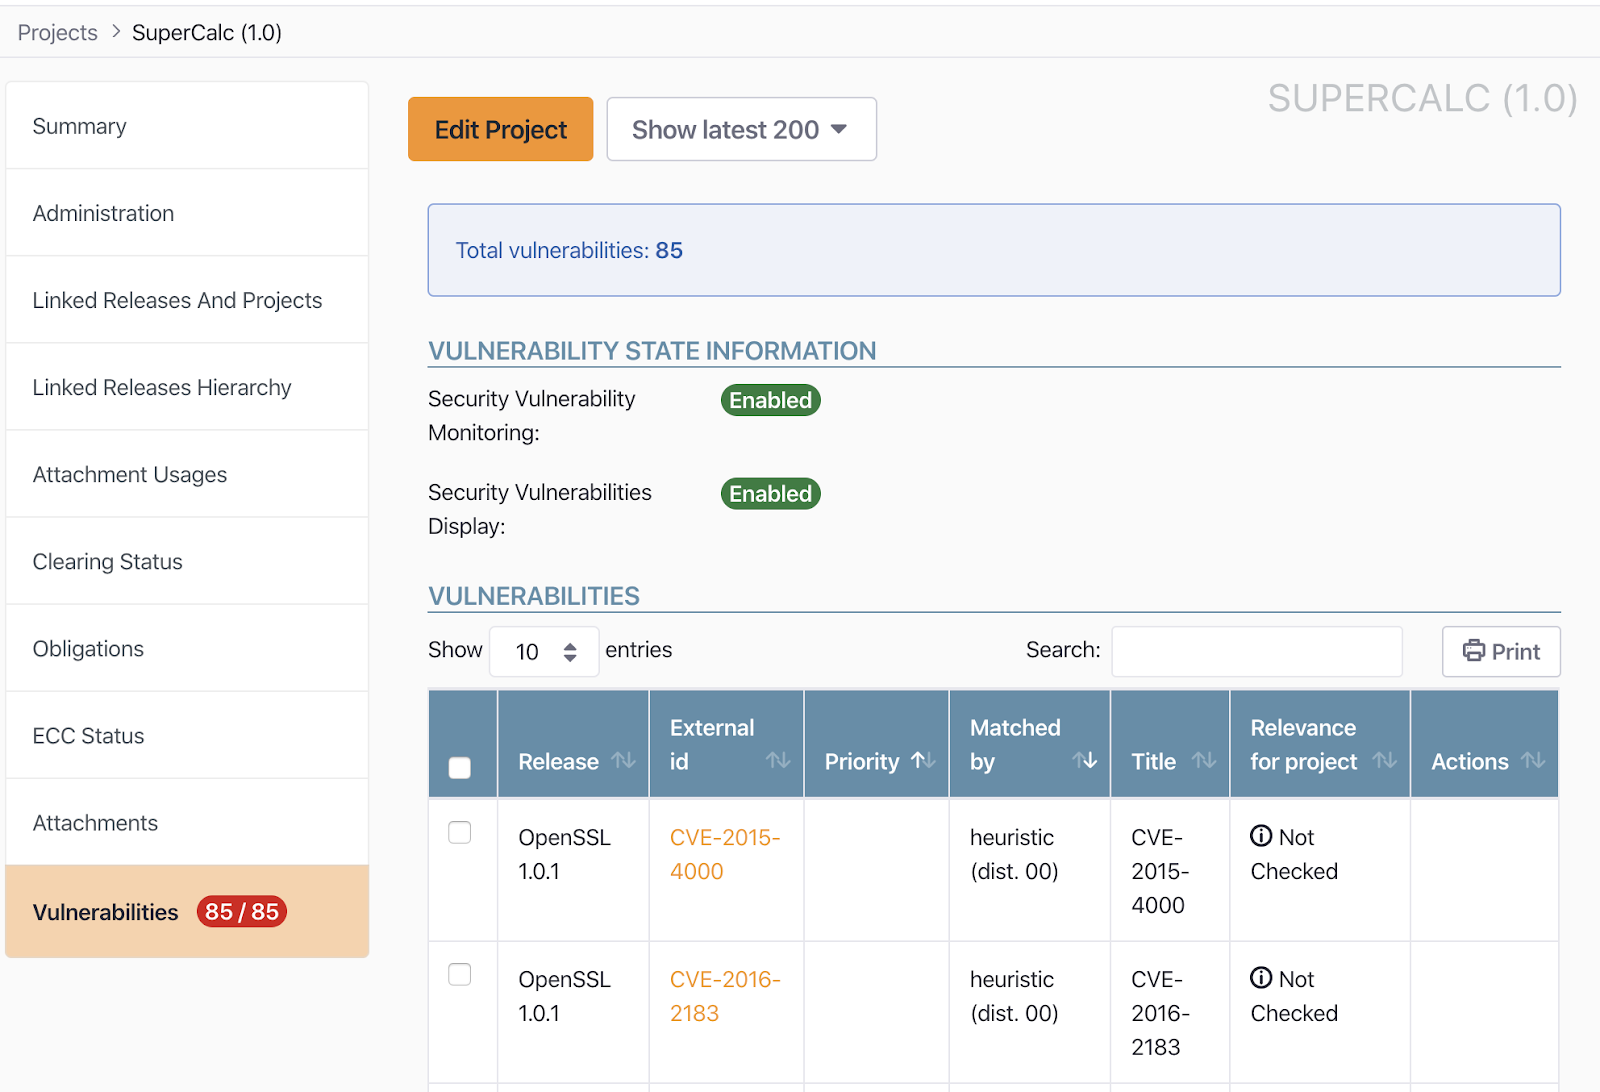
Once the Vulnerabilities information has been collected, you can query whether a created Project has security vulnerabilities. In the SuperCalc Project created above, you can confirm that 85 security vulnerabilities were reported.
By registering and managing the software a company develops and distributes in SW360 this way, you can manage it in a form that minimizes risk not only for open source compliance but also for security vulnerabilities.
SW360 also offers most of its functionality via a REST API in addition to the Web Interface above, making integration with other tools such as FOSSology possible. : https://github.com/eclipse/sw360/wiki/Dev-REST-API
In other words, integrating this into DevOps by, for example, importing the analysis results of a source code scanning tool into SW360, and automating the registration of Projects and Releases, would greatly increase efficiency.
FOSSLight is an open source project led by LG Electronics that uses various scanners to analyze source code, binaries, and dependencies, and generates a Software Bill of Materials (SBOM). In particular, FOSSLight Hub supports the compliance process by providing open source management, license management, and vulnerability management functions.
FOSSLight consists of FOSSLight Scanner and FOSSLight Hub. FOSSLight Scanner runs various scanners to generate analysis results, while FOSSLight Hub provides a web-based UI that integrates, manages, and visualizes the scanner results.
This section explains how to install FOSSLight Scanner and FOSSLight Hub together using Docker Compose.
Install Docker and Docker Compose:
Clone the FOSSLight Repository:
git clone <https://github.com/fosslight/fosslight_hub.git>
cd fosslight_hub
Configure the Docker Compose File:
fosslight_hub directory contains a docker-compose.yml file. You can open this file in a text editor and change the FOSSLight Hub configuration.version: "3.7"
services:
fosslight_db:
image: mariadb:10.6.4
container_name: fosslight_db
volumes:
- fosslight_db:/var/lib/mysql
restart: always
environment:
- MYSQL_ROOT_PASSWORD=fosslight
- MYSQL_DATABASE=fosslight_db
- MYSQL_USER=fosslight
- MYSQL_PASSWORD=fosslight
fosslight_web:
image: fosslight/fosslight_hub:latest
container_name: fosslight_web
ports:
- "8080:8080"
restart: always
environment:
- FOSSLightDB_HOST=fosslight_db
- FOSSLightDB_PORT=3306
- FOSSLightDB_USER=fosslight
- FOSSLightDB_PASSWORD=fosslight
- FOSSLightDB_NAME=fosslight_db
depends_on:
- fosslight_db
fosslight_scanner:
image: fosslight/fosslight_scanner:latest
container_name: fosslight_scanner
restart: always
volumes:
- ./upload:/home/fosslight_scanner/upload
- ./result:/home/fosslight_scanner/result
volumes:
fosslight_db:
Run FOSSLight:
docker-compose up -d
Verify the FOSSLight Installation:
http://localhost:8080 to confirm that you can reach FOSSLight Hub.Figure 2.1: FOSSLight Hub Web UI
(Insert screenshot of the FOSSLight Hub web UI)
FOSSLight can be used through a web UI (FOSSLight Hub) and a CLI (FOSSLight Scanner).
3.1 Using FOSSLight Hub
FOSSLight Hub provides functionality, through a web UI, to manage open source projects, check scan results, and generate various reports.
Register a Project:
Figure 2.2: FOSSLight Hub Project Registration Screen
(Insert screenshot of the FOSSLight Hub project registration screen)
Upload Scan Results:
Figure 2.3: FOSSLight Hub Scan Result Upload Screen
(Insert screenshot of the FOSSLight Hub scan result upload screen)
Check Scan Results:
Figure 2.4: FOSSLight Hub Scan Result Review Screen
(Insert screenshot of the FOSSLight Hub scan result review screen)
Generate Reports:
Figure 2.5: FOSSLight Hub Report Generation Screen
(Insert screenshot of the FOSSLight Hub report generation screen)
3.2 Using FOSSLight Scanner
FOSSLight Scanner provides functionality, through the CLI, to scan source code, binaries, and container images and generate an SBOM.
Run a Scan:
docker run --rm -v $(pwd)/upload:/home/fosslight_scanner/upload -v $(pwd)/result:/home/fosslight_scanner/result fosslight/fosslight_scanner -p /home/fosslight_scanner/upload/<scan target> -o /home/fosslight_scanner/result/<result file name> -f <result format>
-rm: automatically removes the container after it runs.v $(pwd)/upload:/home/fosslight_scanner/upload: shares the upload directory in the current directory with the /home/fosslight_scanner/upload directory inside the container. You need to copy the file or directory to be scanned into this directory.v $(pwd)/result:/home/fosslight_scanner/result: shares the result directory in the current directory with the /home/fosslight_scanner/result directory inside the container. The scan result file is saved to this directory.p /home/fosslight_scanner/upload/<scan target>: specifies the path to the file or directory to be scanned.o /home/fosslight_scanner/result/<result file name>: specifies the name of the scan result file.f <result format>: specifies the scan result format (spdx, cyclonedx, fosslight_json).docker run --rm -v $(pwd)/upload:/home/fosslight_scanner/upload -v $(pwd)/result:/home/fosslight_scanner/result fosslight/fosslight_scanner -p /home/fosslight_scanner/upload/my_project -o /home/fosslight_scanner/result/my_project_sbom.json -f fosslight_json
Check the Scan Results:
result directory.sudo docker run ... command.OSV-SCALIBR (Software Composition Analysis LIBRary) is an open source software composition analysis library developed by Google. It supports various programming languages and aims to provide fast and accurate analysis results. It offers core functionality for generating a Software Bill of Materials (SBOM), but because it is provided as a library rather than as a standalone executable, users need to write their own code to integrate it.
Because OSV-SCALIBR is provided as a library, you need to install it through the package manager appropriate for the programming language you intend to use. This guide explains how to install it in a Python environment.
Confirm Python and pip Are Installed:
python --version
pip --version
Install OSV-SCALIBR:
pip install osv-db
Verify the Installation:
import osv
print(osv.__version__)
Because OSV-SCALIBR is provided as a library, you need to write your own code to generate an SBOM. The following is a basic example of generating an SBOM using OSV-SCALIBR in a Python environment.
Install Required Libraries:
osv-db, install the libraries needed to generate an SBOM (e.g., spdx-tools).pip install spdx-tools
Write the Code:
requirements.txt file, checks vulnerability information using OSV-SCALIBR, and then generates an SBOM in SPDX format.import osv
from spdx_tools.spdx.model import Document, Package
from spdx_tools.spdx.builder import Builder
from spdx_tools.spdx.validation.document_validator import validate_full
import os
def create_sbom_from_requirements(requirements_file):
"""
Extracts dependency information from a requirements.txt file,
checks vulnerability information using OSV-SCALIBR, and then
generates an SBOM in SPDX format.
"""
# 1. Read the requirements.txt file
dependencies = []
with open(requirements_file, "r") as f:
for line in f:
line = line.strip()
if line and not line.startswith("#"):
package_name, package_version = line.split("==")
dependencies.append((package_name, package_version))
# 2. Create the OSV API client
client = osv.Client()
# 3. Create the SPDX document
document = Document(
spdx_version="SPDX-2.2",
data_license="CC0-1.0",
spdx_id="SPDXRef-DOCUMENT",
name="SBOM for " + requirements_file,
)
document.creators = ["Tool: OSV-SCALIBR Example Script", "Organization: Your Organization"]
# 4. Add package information and check vulnerability information
for package_name, package_version in dependencies:
# Query vulnerability information using the OSV API
vulnerabilities = client.get_vulnerabilities(package_name, package_version)
# Create the package
package = Package(
name=package_name,
spdx_id=f"SPDXRef-Package-{package_name}",
version=package_version,
# TODO: License information needs to be added.
)
# If vulnerability information exists, add a comment
if vulnerabilities:
comment = f"Vulnerabilities found: {len(vulnerabilities)}"
package.comment = comment
document.packages.append(package)
# 5. Validate and output
validation_messages = validate_full(document)
if validation_messages:
print("Validation errors:")
for message in validation_messages:
print(message)
else:
# Convert the SPDX document to a string (using spdx-tools)
from spdx_tools.spdx.writer.write_anything import write_anything
output_file = "sbom.spdx"
write_anything(document, output_file, "tag", check_licenses=False)
print(f"SPDX document generated successfully! File: {output_file}")
# Example run
# The requirements.txt file must be in the current directory.
if os.path.exists("requirements.txt"):
create_sbom_from_requirements("requirements.txt")
else:
print("Error: could not find the requirements.txt file.")
Run the Code:
sbom_generator.py), and run the following command.python sbom_generator.py
Check the Results:
sbom.spdx file is generated. This file contains the SBOM written in SPDX format.requirements.txt file, but a real environment may need support for various package managers.An SBOM (in SPDX format) generated using OSV-SCALIBR would have a structure like the following. (The actual content depends on the contents of the requirements.txt file.)
SPDXVersion: SPDX-2.2
DataLicense: CC0-1.0
SPDXID: SPDXRef-DOCUMENT
Name: SBOM for requirements.txt
Creator: Tool: OSV-SCALIBR Example Script
Created: 2025-02-11T00:00:00Z

# Package Information
PackageName: requests
SPDXID: SPDXRef-Package-requests
PackageVersion: 2.28.1
# Comment: Vulnerability found: 1 (may vary depending on the OSV database)

PackageName: urllib3
SPDXID: SPDXRef-Package-urllib3
PackageVersion: 1.24.13

# Relationships
# (Dependency relationship information between each package)
Note: the example above merely shows the format of an SBOM that OSV-SCALIBR could generate; the actual SBOM content depends on the code and the dependency analysis results. Additional information such as license information and origin information needs to be added by modifying the code directly.
Caution: because OSV-SCALIBR is a library, this guide alone may not be enough to complete SBOM generation. It requires an understanding of Python programming and SBOM generation, along with additional code.