SW360
A company that develops and distributes products containing open source must collect and track information such as the version and license of the open source used in each product and each release version. This allows the company to carry out proper open source compliance activities.
In particular, when a security vulnerability is reported in the NVD (https://nvd.nist.gov/vuln) for a specific open source version, if a company cannot trace which products use that version, it has no way of knowing which products need the security patch, leaving those products exposed to the security vulnerability.
For this reason, tracking open source information is essential. Companies build their own systems for this or purchase commercial services. SW360 is an open source project sponsored by the Eclipse Foundation that provides a web application and repository for collecting and tracking software BOM information.
Key Features
SW360 provides a web-based UI, and its key features are as follows.
- Tracking components used in a product
- Security vulnerability assessment
- License obligation management
- Generating legal documents such as notices

Installation
SW360 is composed of the following.
- Frontend : Liferay-(Tomcat-)based portal application
- Backend : Tomcat-based thrift service
- Database : CouchDB
For details on the project structure and the software required for installation, see the Required software section of the README: https://github.com/eclipse/sw360/blob/master/README.md
SW360 offers the following three installation methods. Users can choose whichever one suits them.
- Vagrant (https://www.vagrantup.com/)-based installation: Vagrant is a tool for managing virtualized instances, and sw360vagrant provides an environment for deploying SW360 all at once. : https://github.com/sw360/sw360vagrant
- The components of SW360 can be installed individually. : https://github.com/eclipse/sw360
- It can be deployed via Docker. : https://github.com/sw360/sw360chores
Here, we introduce how to install and deploy SW360 on a CentOS 7.6 system using the Vagrant-based method. For more detail, refer to the README. : https://github.com/sw360/sw360vagrant/blob/master/README.md
1) Prerequisites
To install SW360 on a Vagrant box, you must first install openjdk, VirtualBox, and Vagrant. First, install openjdk 1.8.0.
$ yum install java-1.8.0-openjdk
$ java -version
openjdk version "1.8.0_191"
OpenJDK Runtime Environment (build 1.8.0_191-b12)"
OpenJDK 64-Bit Server VM (build 25.191-b12, mixed mode)
Install VirtualBox.
$ sudo wget https://download.virtualbox.org/virtualbox/rpm/el/virtualbox.repo -P /etc/yum.repos.d
$ sudo yum install VirtualBox-5.2
If, when installing VirtualBox on CentOS 7, you get a “kernel module is not loaded” error, resolve it by installing kernel-devel and then reinstalling VirtualBox.
$ sudo yum install https://centos7.iuscommunity.org/ius-release.rpm
$ sudo yum install dkms
$ sudo yum install kernel-devel
# reboot
$ sudo /sbin/vboxconfig
$ systemctl status vboxdrv
● vboxdrv.service - VirtualBox Linux kernel module
   Loaded: loaded (/usr/lib/virtualbox/vboxdrv.sh; enabled; vendor preset: disabled)
   Active: active (exited) since Wed 2020-02-19 09:06:02 KST; 20min ago
Install Vagrant and the vagrant-aws plugin.
$ sudo yum install https://releases.hashicorp.com/vagrant/2.2.6/vagrant_2.2.6_x86_64.rpm
# install the vagrant-aws plugin
$ vagrant plugin install vagrant-aws
Then, clone the sw360vagrant code.
$ git clone https://github.com/sw360/sw360vagrant.git
2) Downloading Dependencies
To reduce the time it takes to build the Vagrant box, download the dependency packages in advance.
$ cd sw360vagrant
$ ./download-packages.sh
The following packages are then downloaded into the ./shared/package folder.
- Liferay 7.2.1 CE GA2 with Tomcat (9.0.17)
- Postgresql-42.2.9 ODBC client for Java as *.jar file
- 11 *.jar files required by SW360
- Thrift 0.11
- A box images from the Ubuntu 16.04 LTS (xenial-server-cloudimg-amd64-vagrant.box)
3) Creating the Base Box
Now, create the base box with the following commands.
$ cd generate-box
$ ./generate_box.sh
This step can take several tens of minutes.
4) Running the Box
Run the box with the following commands.
# If you have built a vagrant box from this directory earlier, you will have to destroy it first via
$ vagrant destroy
$ cd ../sw360-single
$ vagrant up
Running the box configures Liferay, PostgreSQL, and CouchDB. If it runs without issue, you can access the Liferay screen at https://localhost:8443/.

5) Deploying the SW360 Layout
The final step is deploying the SW360 layout on Liferay. This step is not yet automated, so an administrator must perform it manually. Access https://localhost:8443/ and log in with the following account.
- id : setup@sw360.org
- pw : sw360fossy
After that, follow the instructions on the following site to deploy the layout. https://github.com/eclipse/sw360/wiki/Deploy-Liferay7
Once the deployment is complete, you will see a screen like the following.

Basic Workflow
1) Registering Licenses
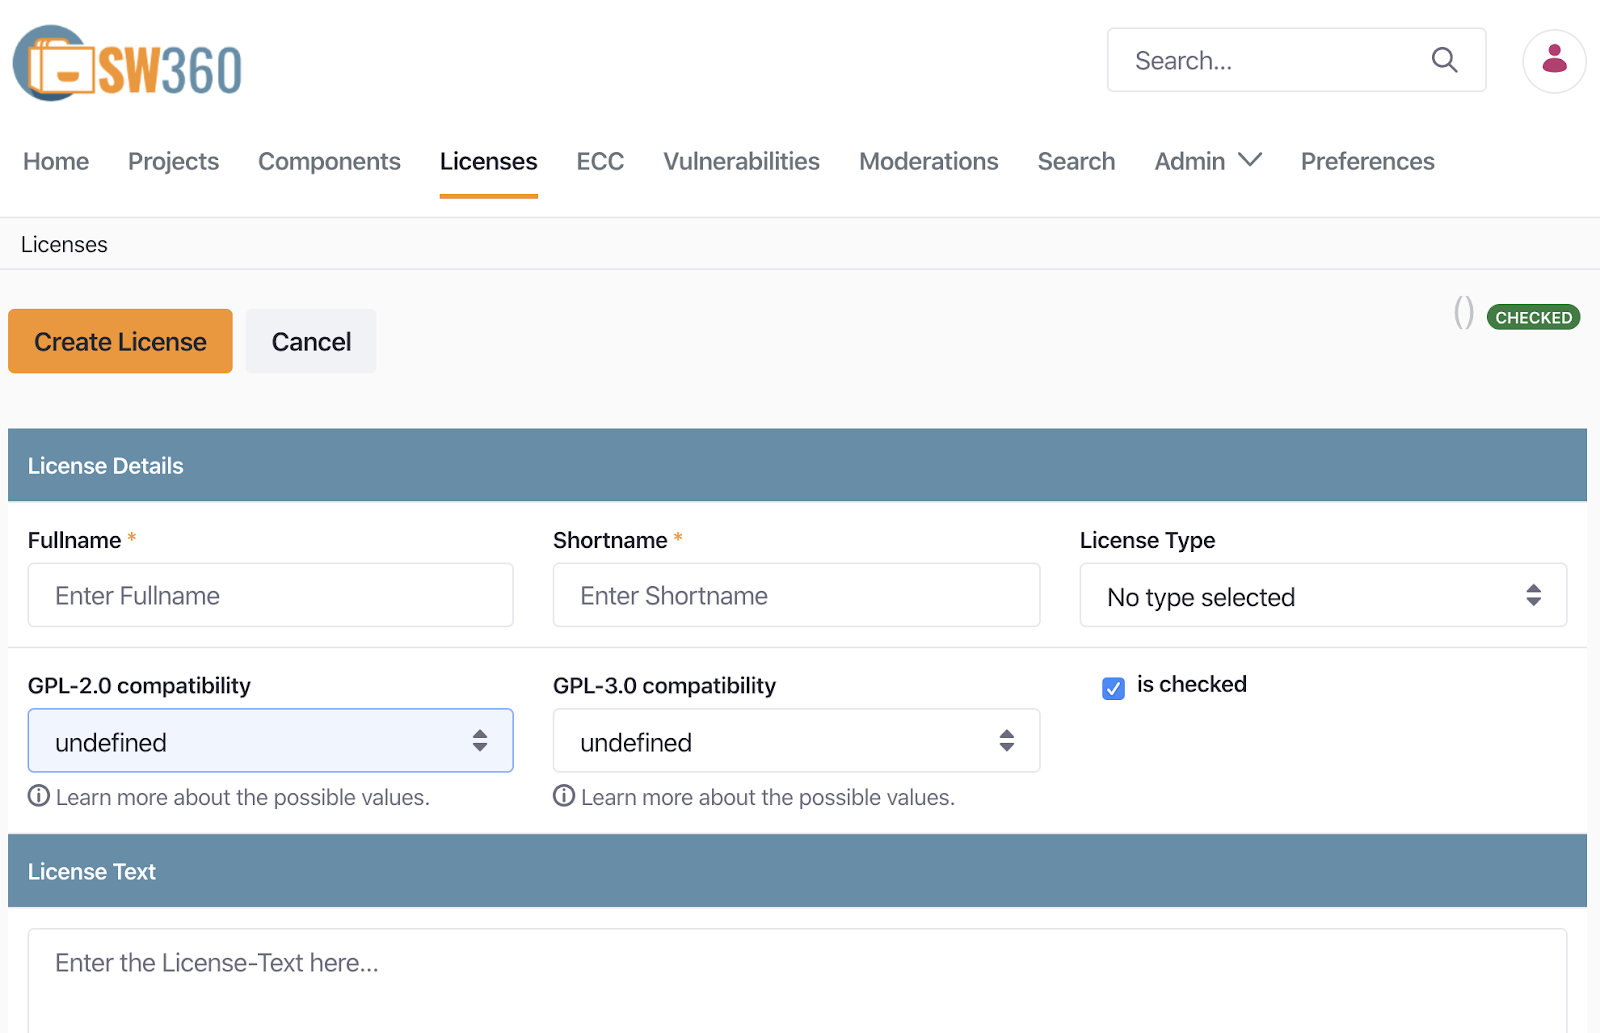
The first time you install SW360, you must register the open source licenses you commonly use. A license includes the following information.
- Full Name
- Short Name
- License Type
- GPL-2.0 Compatibility (e.g. yes, no)
- License Text
Selecting Menu > Licenses > Add License takes you to the Create License screen, shown below.
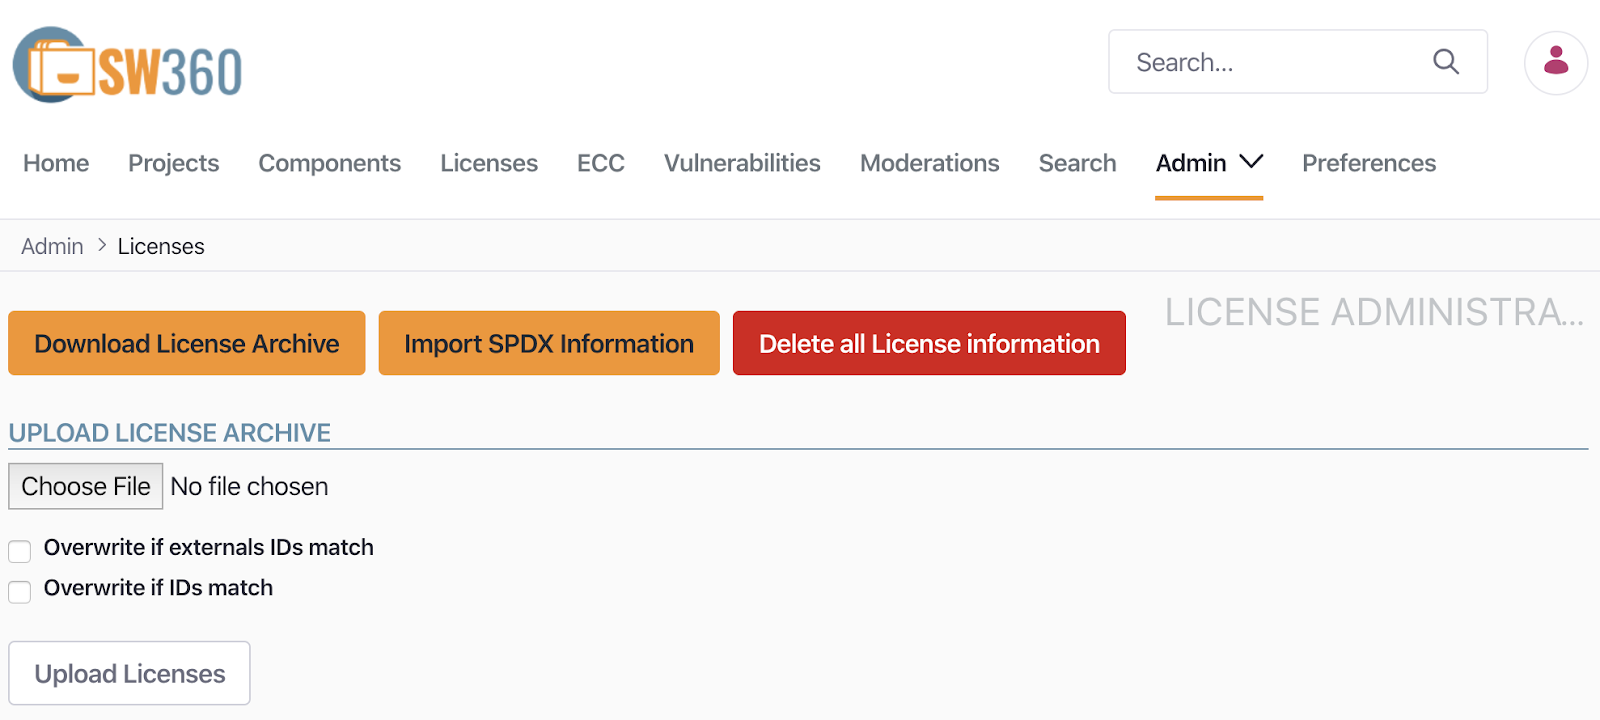
Registering licenses one by one this way can be quite tedious, but fortunately SW360 provides a feature to import the entire SPDX License List at once. Click Menu > Admin < Import SPDX Information.
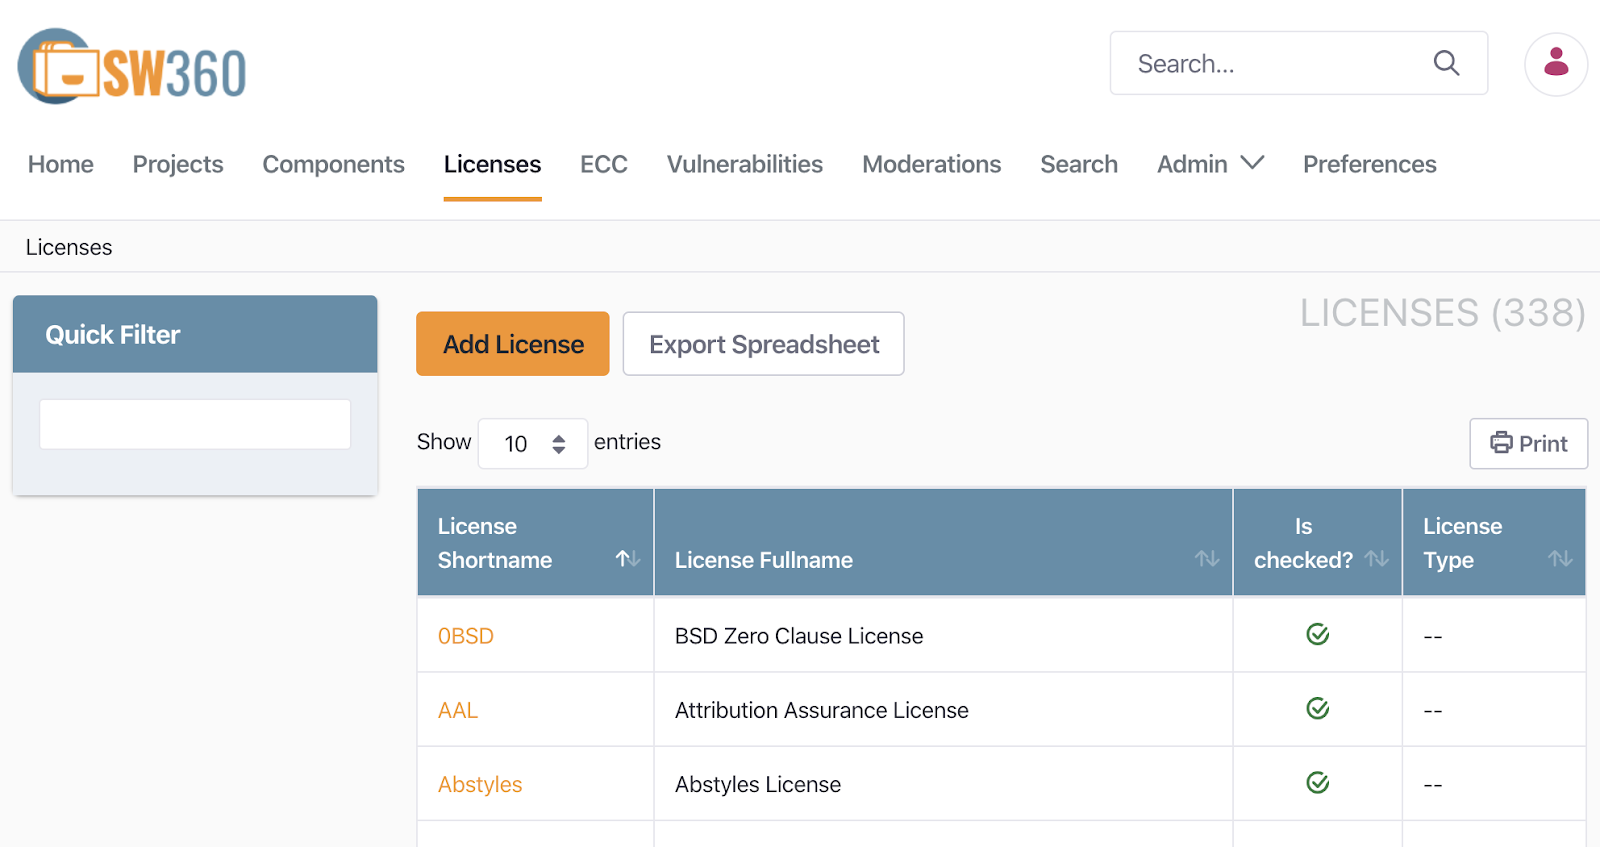
The SPDX License List is then registered automatically. You can confirm that 338 licenses have been registered under Menu > Licenses.
2) Registering Components and Releases
In SW360, a Component is a single unit of software. It can correspond to various kinds of software, including the following.
- Open source software
- Libraries
- Third-party software
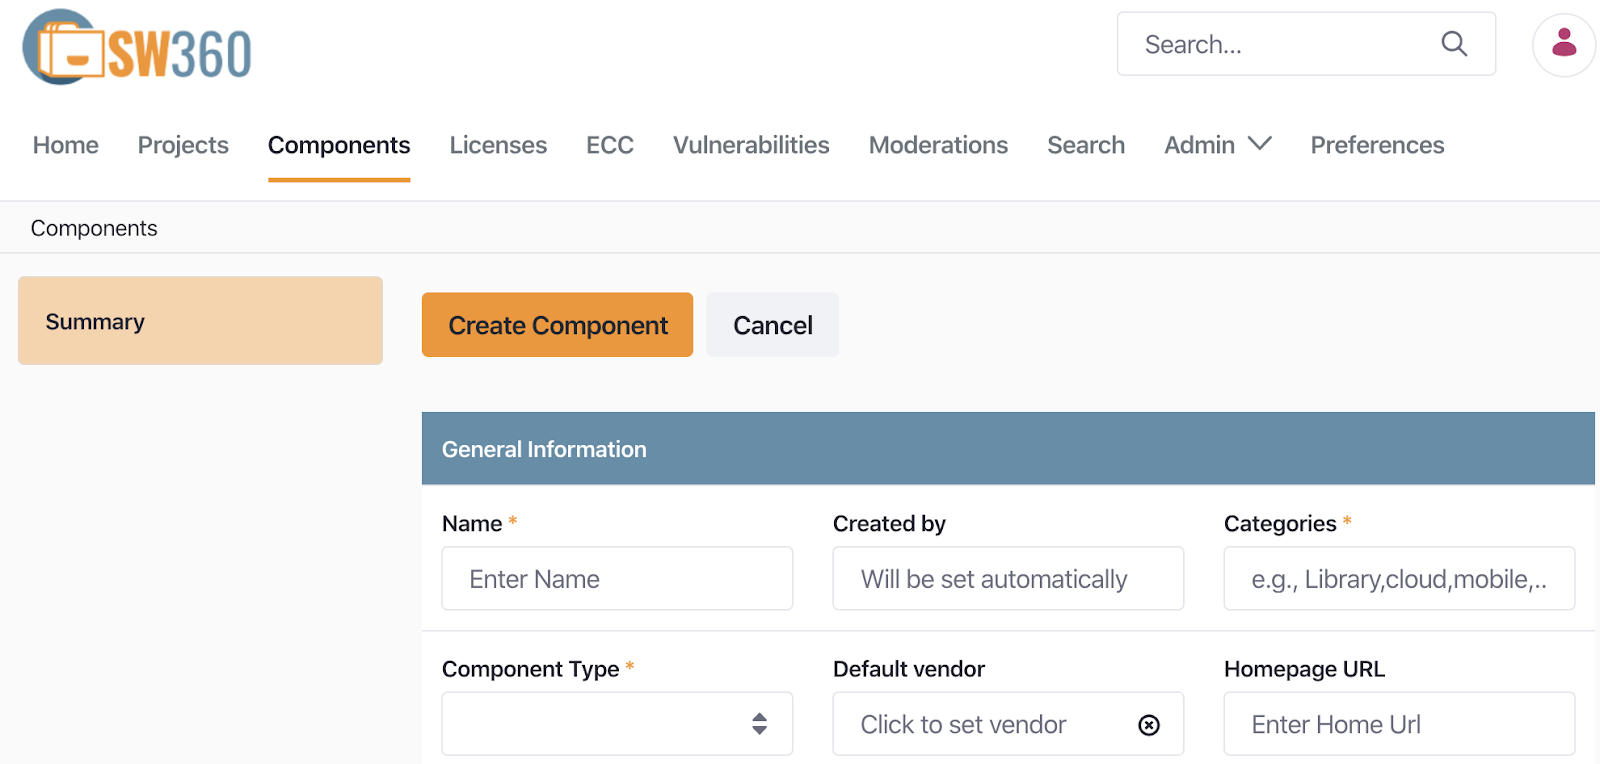
A Component includes the following information.
- Component Name
- Main Licenses
- Categories (e.g. Library, Cloud, Mobile, …)
- Component Type (e.g. OSS, Internal, InnerSource, Service, Freeware)
- Default Vendor
- Homepage URL
A Release is a unit that points to a single version of a Component. A single Component can therefore have multiple Releases. A Release is created and managed under a Component.
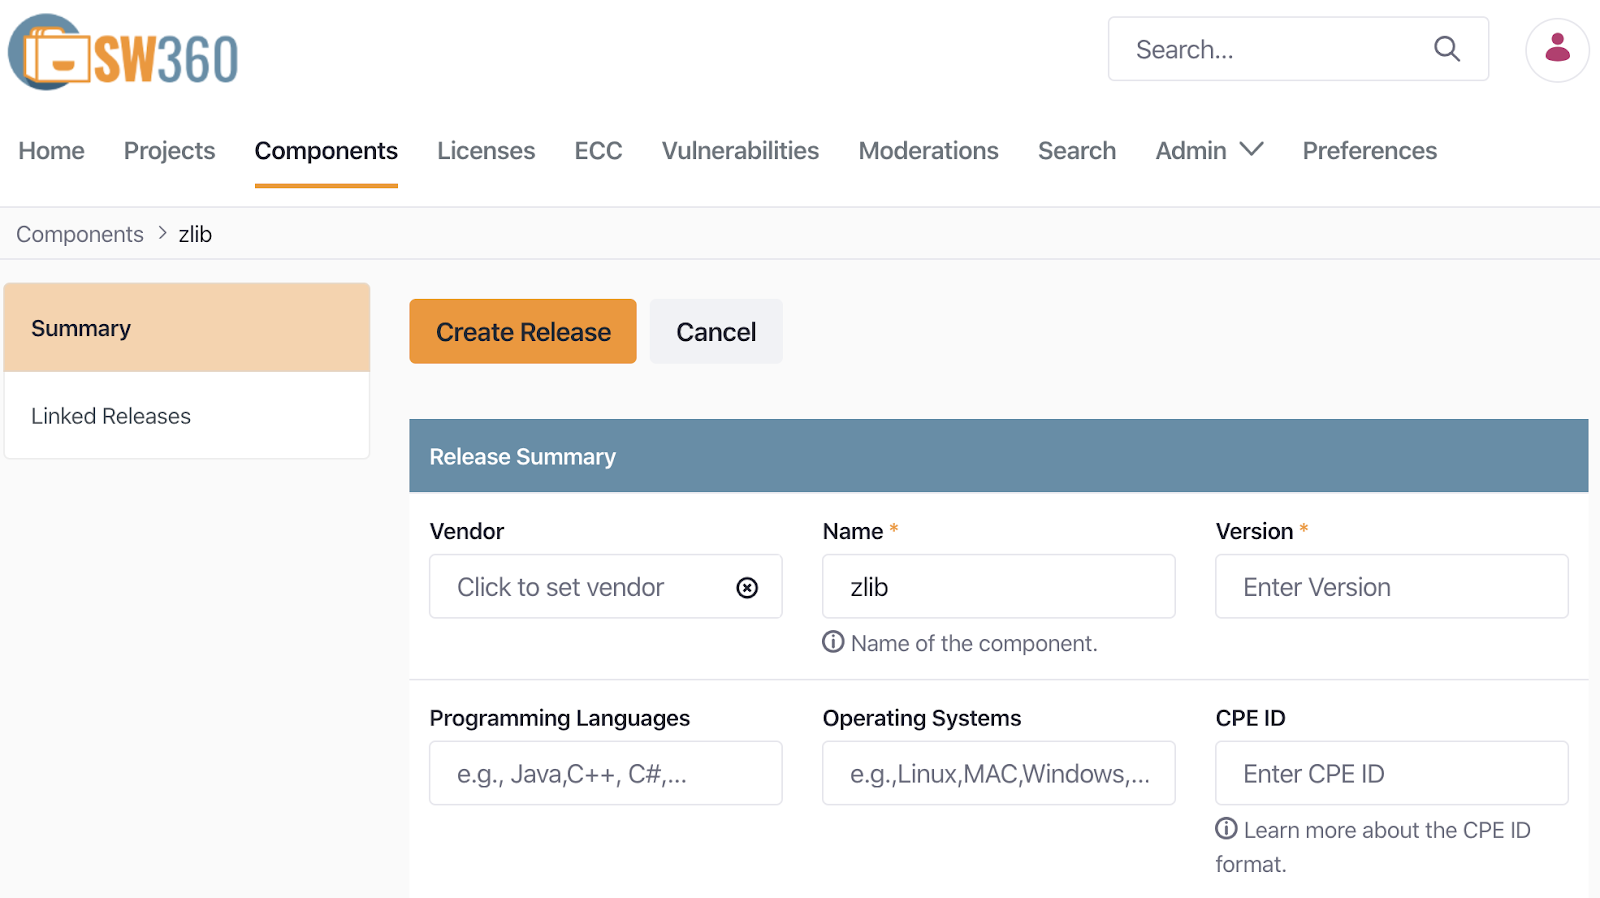
A Release includes the following information.
- Component Name
- Version
- License
- Download URL
- CPE ID (e.g. cpe:2.3:a:apache:maven:3.0.4)
For example, to register zlib-1.2.8, you would first register zlib as a Component, and then register zlib 1.2.8 as a Release. Selecting Menu > Components > Add Component takes you to the Create Component screen, where you can register information about zlib.
Once you have created the Component, you can register information for the zlib-1.2.8 version at Components > Releases > Add Release.
After registering versions 1.2.8 and 1.2.11 as separate Releases under the single Component zlib, the Release Overview screen shows the following two Releases.

SW360 also provides a feature for importing information for multiple Components at once. You can enter the Component information you want to register into the CSV template under Menu > Admin > Import / Export and import it.
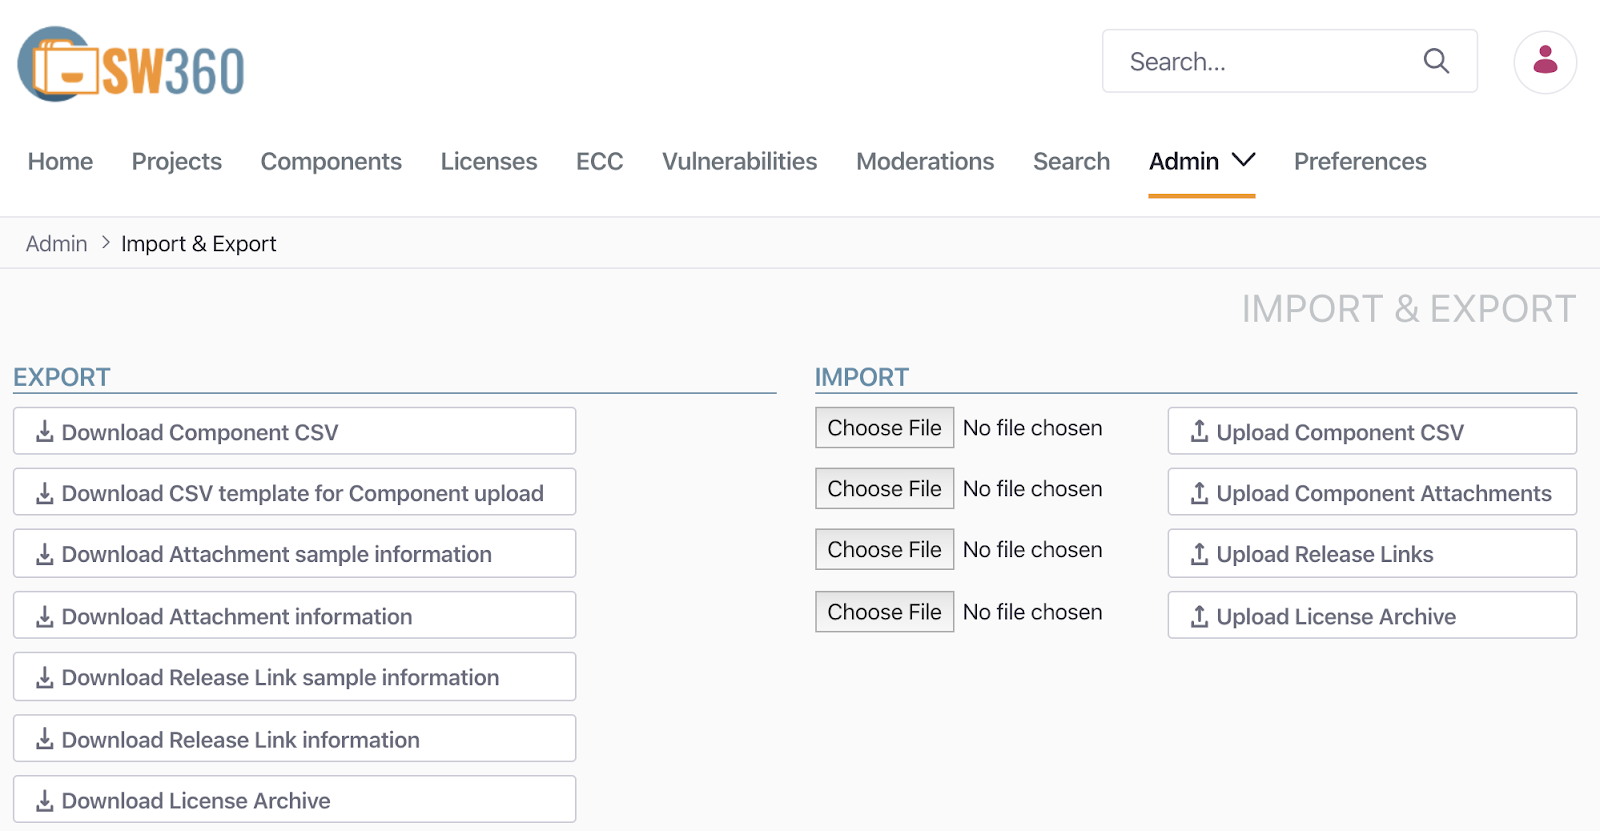
Note that, as of February 2020, this feature may not yet work reliably.
3) Creating a Project
A Project refers to a single product. Depending on the type of business, it could be a product, a service, or software. A Project registers and manages the Components/Releases used in the product.
When creating a Project, you register the following information.
- Project Name
- Version
- Project type (e.g. Product, Customer Project, Service, Internal Project, InnerSource)
You can create a Project via Menu > Projects > Add Project.
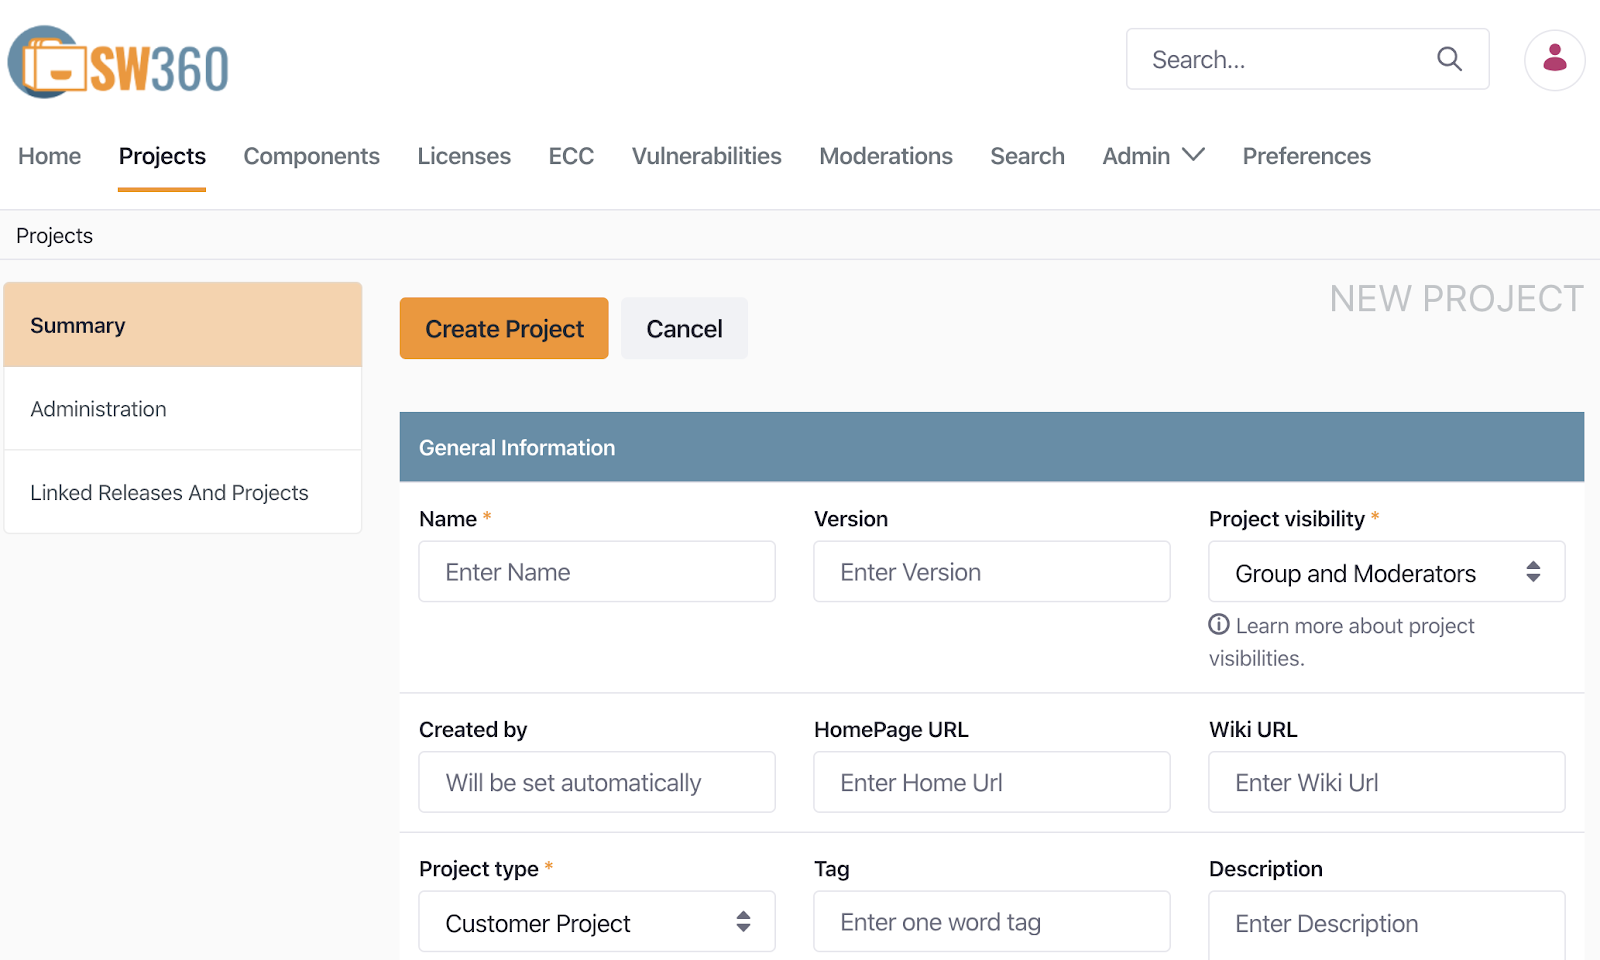
After creating a Project, register the Releases or sub-Projects it includes. Selecting the Project under Menu > Projects lets you register Linked Projects and Linked Releases under “Linked Releases and Projects.”
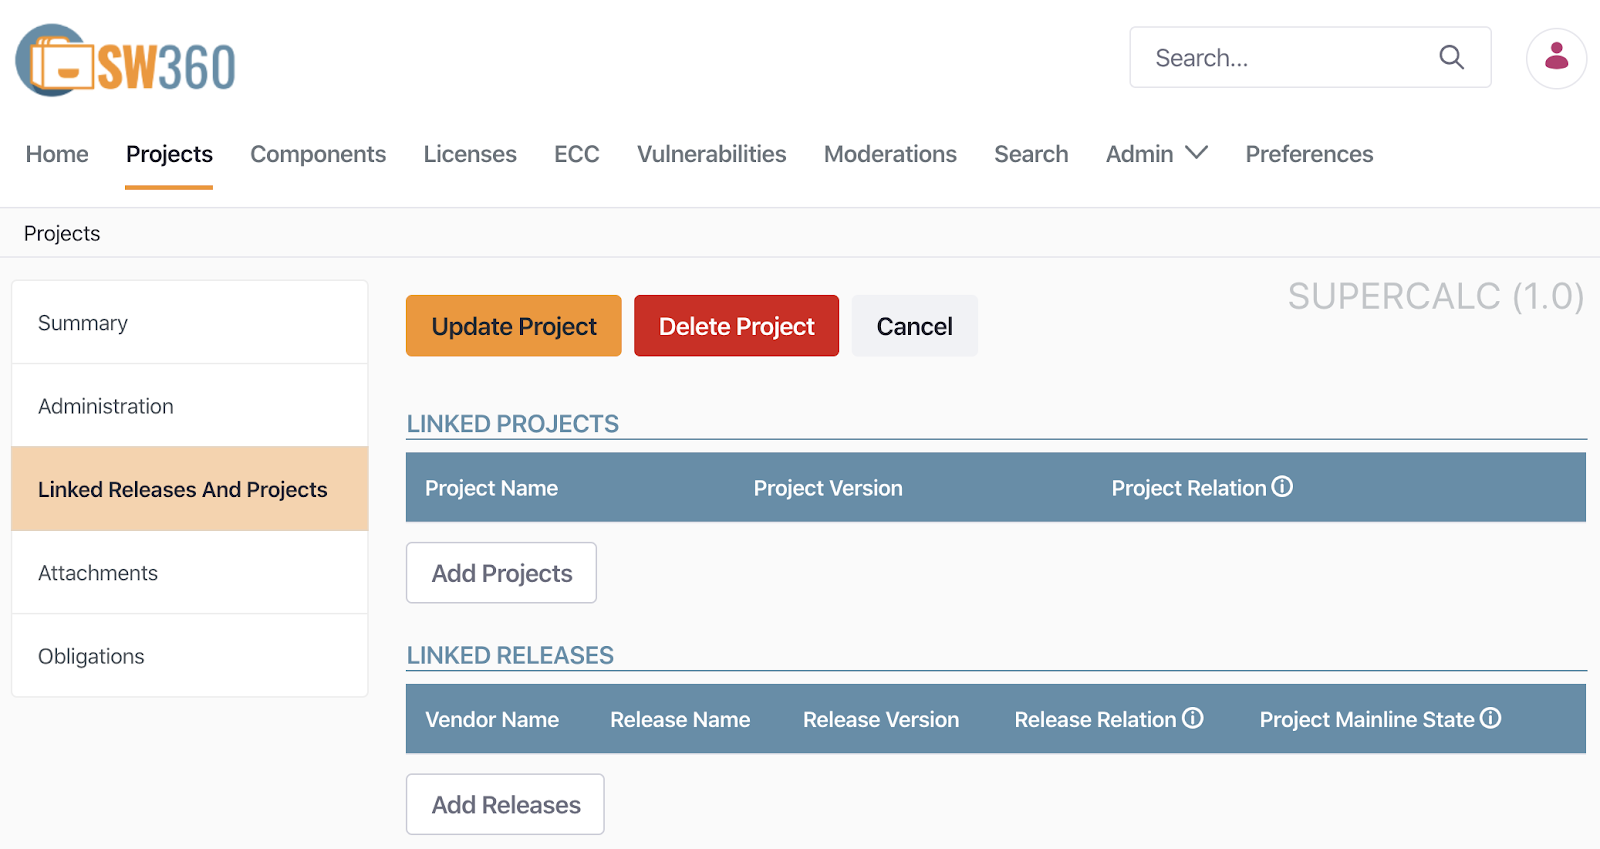
The following is the screen after registering OpenSSL 1.0.1 and zlib 1.2.8 as Linked Releases under a Project called SuperCalc.

4. Security Vulnerability Management
SW360 can automatically check whether a registered Release has a security vulnerability. To do this, SW360 provides a feature for scheduling periodic collection of CVE information. Under Menu > Admin > Schedule, you can set up a schedule to collect CVE SEARCH information every 24 hours.

With this schedule set, SW360 collects CVE information at the scheduled time from the CVE Search site (https://cve.circl.lu/). The collected CVE information can be viewed under Menu > Vulnerabilities.

Once Vulnerabilities information has been collected, you can check whether a created Project has any security vulnerabilities. In the SuperCalc Project created above, you can see that 85 security vulnerabilities have been reported.
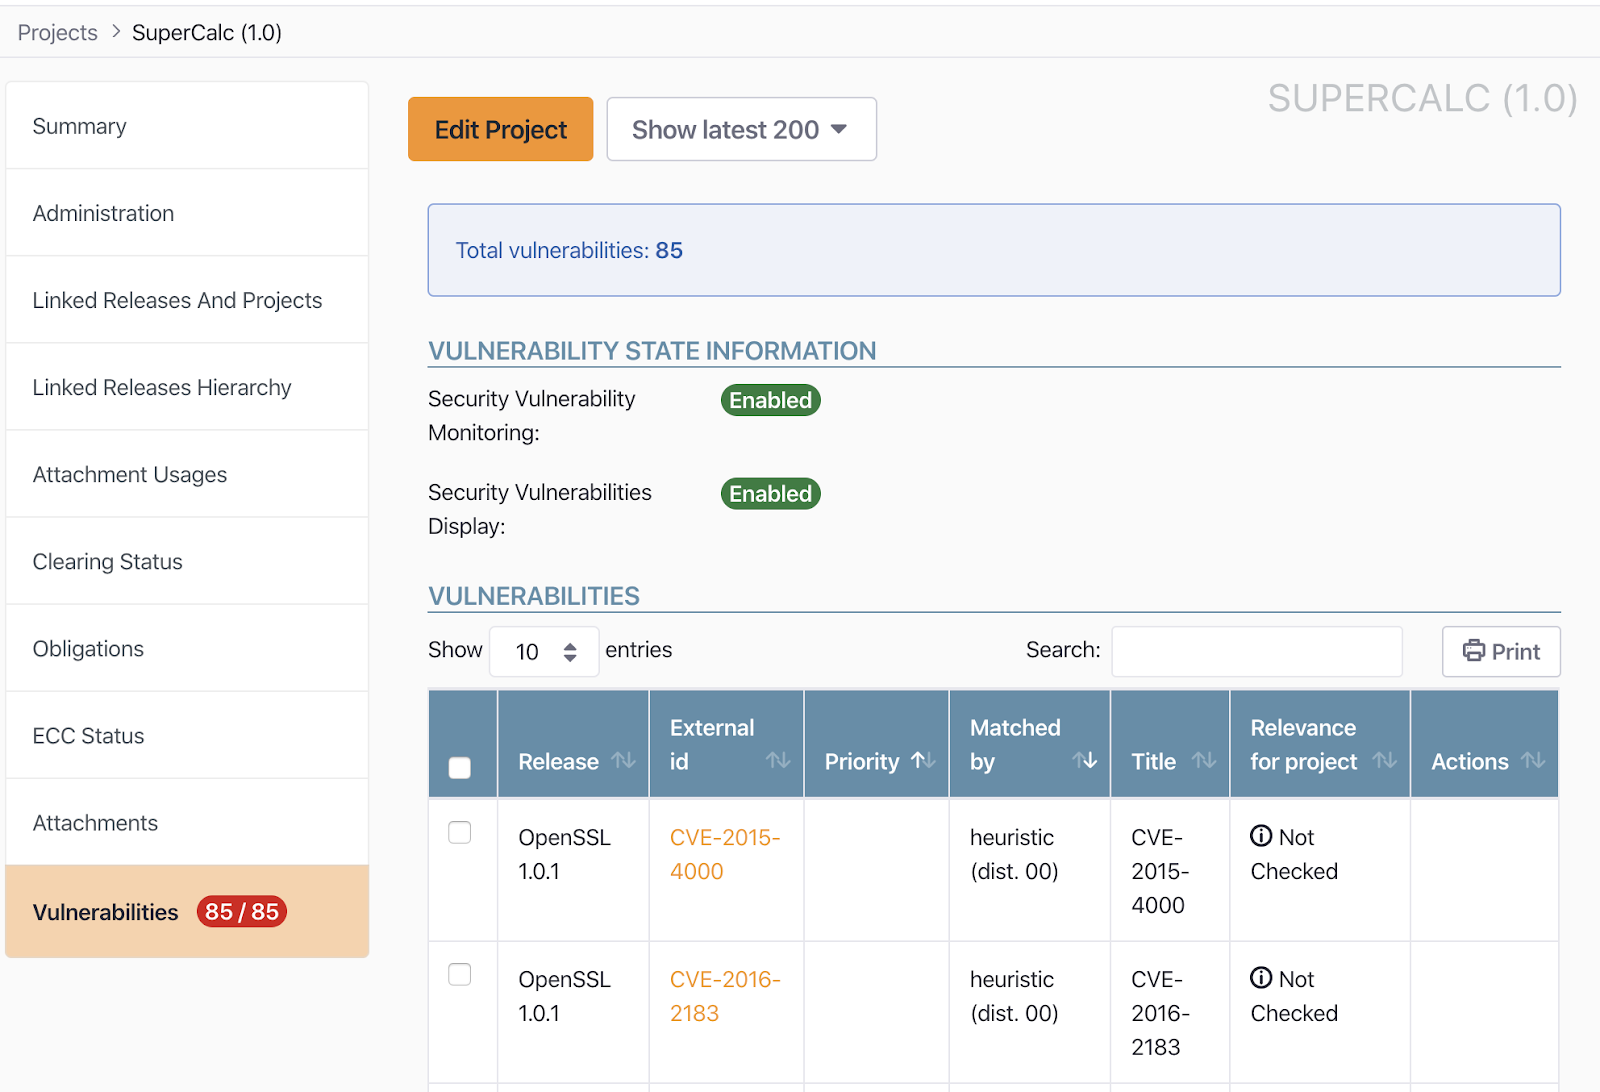
By registering and managing the software a company develops and distributes in SW360 this way, it becomes possible to manage not only open source compliance but also security vulnerability risk in a way that minimizes it.
SW360 also exposes most of its features as a REST API in addition to the web interface above, making it possible to integrate with other tools such as FOSSology. : https://github.com/eclipse/sw360/wiki/Dev-REST-API
In other words, by importing the analysis results of a source code scanning tool into SW360 and integrating it into DevOps to automate the registration of Projects and Releases, efficiency can be increased significantly.